Enter The Matrix
Enter The Matrix (ETM) is a Tool to Aid Operators During Risk Assessment in Creating Threat Matrices and Directed Threat Graphs


Enter The Matrix (ETM) allows operators to collaboratively edit Threat Scenarios and Events to be exported as threat matrices for entire assessments, or Directed Threat Graphs for individual Scenarios. Threat Matrices are based on the NIST 800-30r1 guidelines and also include some minor changes that incorporate, among other things, the MITRE ATT&CK framework.
Purpose
The motivation for creating this tool is to help maintain consistency when quantifying factors that go into individual Threat Events. To achieve this purpose, “Steplates” can be created and imported into Threat Scenarios. The tool also aims to make the process as quick and painless as possible for operators while still providing valuable data points to their clients.
Features
- Templated Threat Events (Steplates)
- Threat Matrix Export
- Directed Threat Graphs Export
- Custom Graph Icons
- LDAP Authentication
- User Account Management
- Fully Dockerized and Separated Database (MongoDB), Reverse Proxy (Nginx), and ETM (.NET Core)
- NIST 800-30r1 Info-Helpers
- MITRE ATT&CK ID Info-Links
Deploying ETM
Installing Dependencies
ETM is written with .NET Core, and is designed to run on Linux systems. ETM also is designed to work within Docker containers.
Updating
sudo apt update
sudo apt upgrade
Installing Vim
sudo apt install vimInstalling GIT
sudo apt install gitInstalling DOS2Unix
sudo apt install dos2unixInstalling Docker Engine
sudo apt update
sudo apt install apt-transport-https ca-certificates curl gnupg-agent software-properties-common
curl -fsSL https://download.docker.com/linux/ubuntu/gpg | sudo apt-key add -
sudo add-apt-repository "deb [arch=amd64] https://download.docker.com/linux/ubuntu $(lsb_release -cs) stable"
sudo apt update
sudo apt install docker-ce docker-ce-cli containerd.io docker-compose
Setting Up Your Environment
Creating Directories
mkdir /var/matrix
mkdir /var/matrix/app
mkdir /var/matrix/mongo
mkdir /var/matrix/mongo/db
mkdir /var/matrix/mongo/configdb
Cloning ETM
cd /var/matrix/app
git clone https://github.com/blacklanternsecurity/enter_the_matrix.git
Editing Docker-compse.yaml
Change the following line to a unique password (alphanumeric):
MONGO_INITDB_ROOT_PASSWORD=CHANGEMESUCKAHEditing AppSettings.JSON
cd /var/matrix/app/enter_the_matrix
vim appsettings.json
Alter the ConnectionString to use your password for the MongoDB container.
Replace the "Ldap" fields with your LDAP configuration.
Replace the "LocalAuthSettings" with your desired administrative account credentials.
SSL Certificate
Place your SSL certificate at
/var/matrix/app/enter_the_matrix/matrix.cerPlace your SSL key at
/var/matrix/app/enter_the_matrix/matrix.keyTo create your own self-signed certificate and key:
sudo openssl req -x509 -nodes -days 365 -newkey rsa:2048 -keyout matrix.key -out matrix.cerNginx Config
Alter enter_the_matrix.conf and replace YOURDOMAIN with your domain if you are using one.
For whatever reason the nginx configuration does not play nicely coming from a Windows development environment even when specifically telling GIT to convert to LF end-of-line format. So, do the following:
dos2unix /var/matrix/app/enter_the_matrix/enter_the_matrix.confBuild
.NET SDK
If you are using Ubuntu 18.04:
wget https://packages.microsoft.com/config/ubuntu/18.04/packages-microsoft-prod.deb -O packages-microsoft-prod.debIf you are using Ubuntu 18.04:
wget https://packages.microsoft.com/config/ubuntu/20.04/packages-microsoft-prod.deb -O packages-microsoft-prod.debsudo dpkg -i packages-microsoft-prod.deb
sudo apt-get install -y apt-transport-https
sudo apt-get update
sudo apt-get install -y dotnet-sdk-5.0Building the Project
sudo cd /var/matrix/app/enter_the_matrix
sudo dotnet publish --configuration Release
Deploying
cd /var/matrix/app/enter_the_matrix
docker-compose up -d
ETM usage
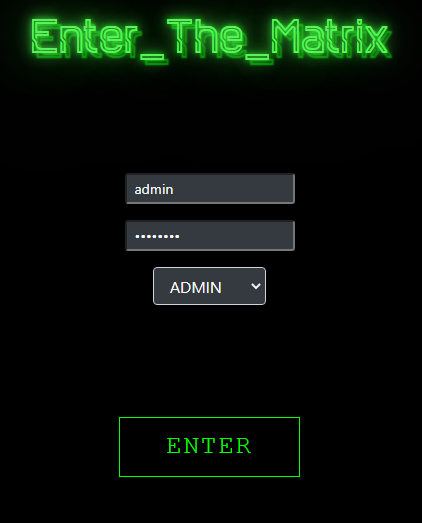
Access to all parts of the application requires authentication first.
User Management
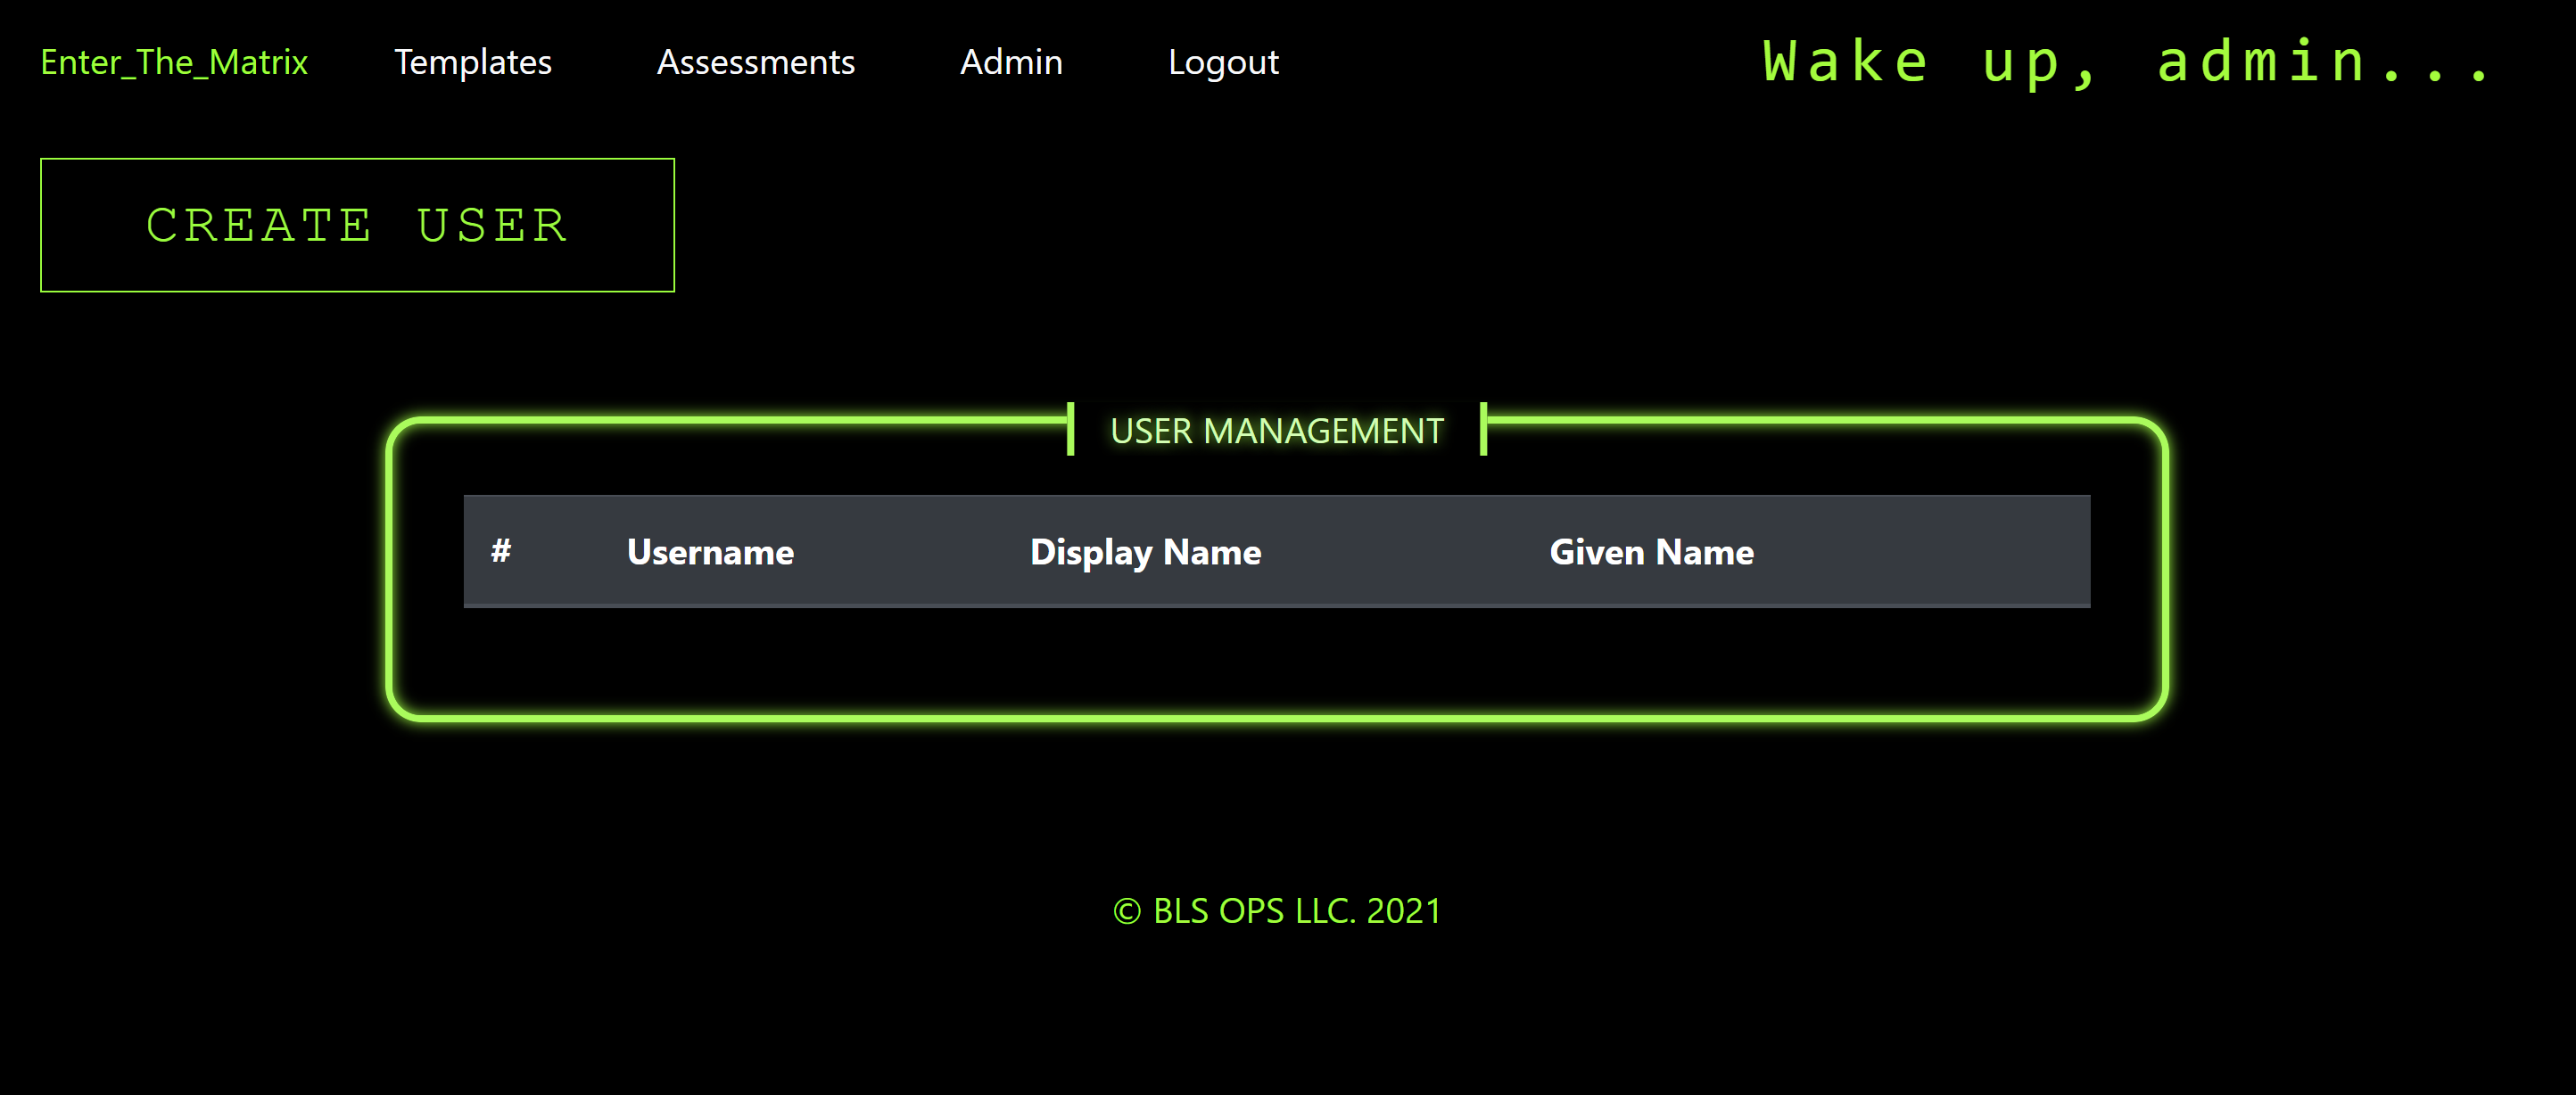
User Management Page
If you do not have LDAP authentication in place already, an administrative user can create user accounts within the application. From the login screen, select the "ADMIN" authentication option and sign in with the credentials set in the appsettings.json file during deployment.
Once you are authenticated as an administrator, you will be brought to the User Management page. Selecting "CREATE" will prompt you to input a new Username, Display Name, Given Name and Password.
Display Names are used in the application as part of the CSS styling. Given Names are used when creating Assessments/Scenarios/Events to tag activities to users.
You can also get to this page by clicking the "Admin" link at the top of every page after a person is authenticated. If the user is not in the "Admin" role, then they will be logged out and brought to the login screen again in order to authenticate as an "Admin" user.
Editing Users
Selecting the "Edit" link next to each user will bring up a prompt to edit the Display Name, Given Name and Password for a user. The Username is not able to be changed.
Deleting Users
Selecting the "Delete" link next to each user will bring up a confirmation prompt before proceeding to remove the user from the database.
Creating an Assessment
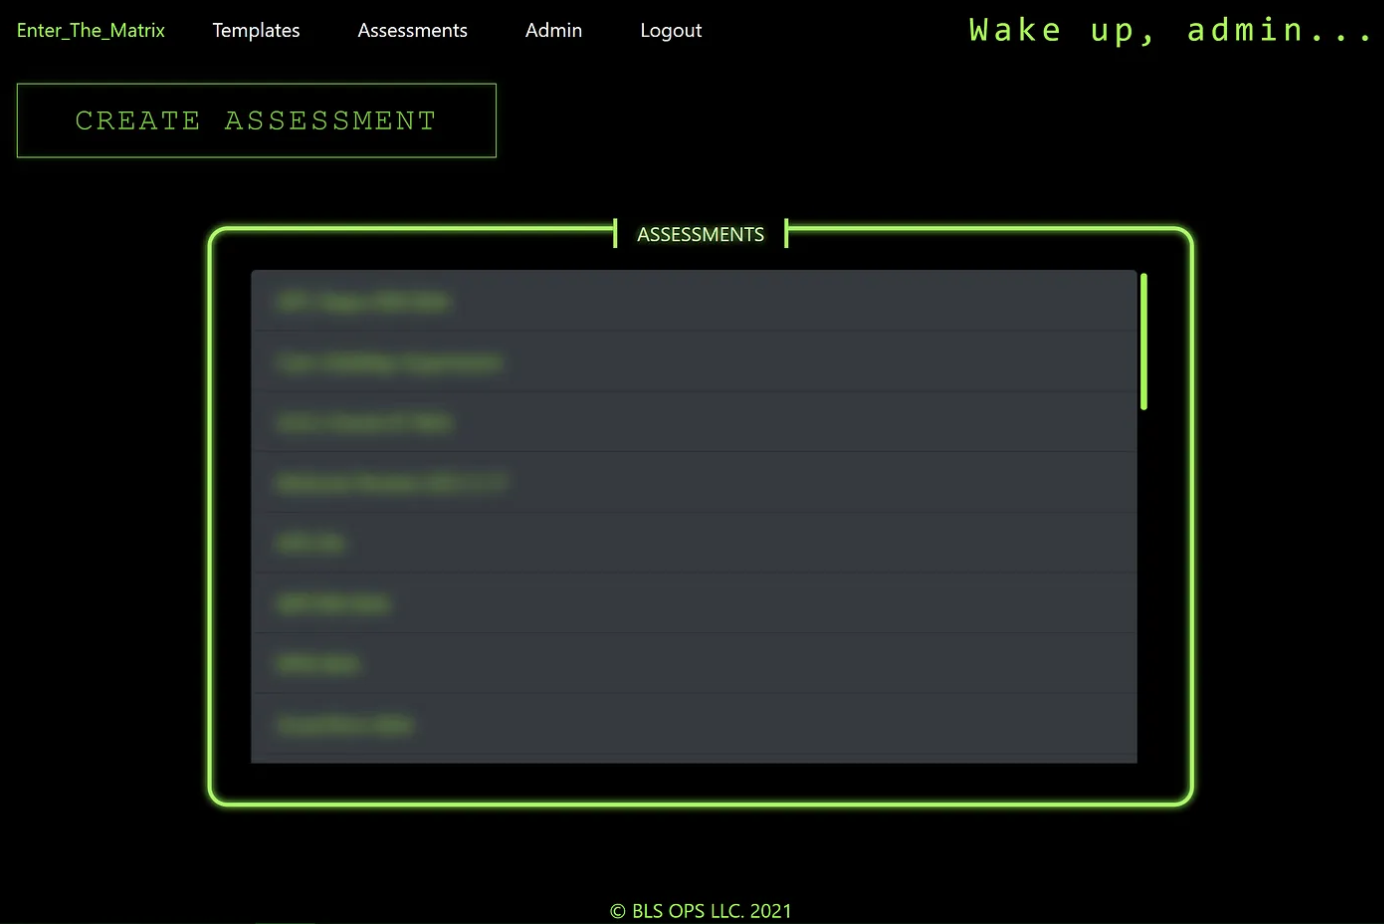
Assessments Page
Once you are logged in properly, navigate to "Assessments" and then click the "CREATE ASSESSMENT" button. Supply a title for the Assessment you are creating and click "CREATE".
If you are enjoying this article your support would be greatly appreciated!
Creating a Scenario
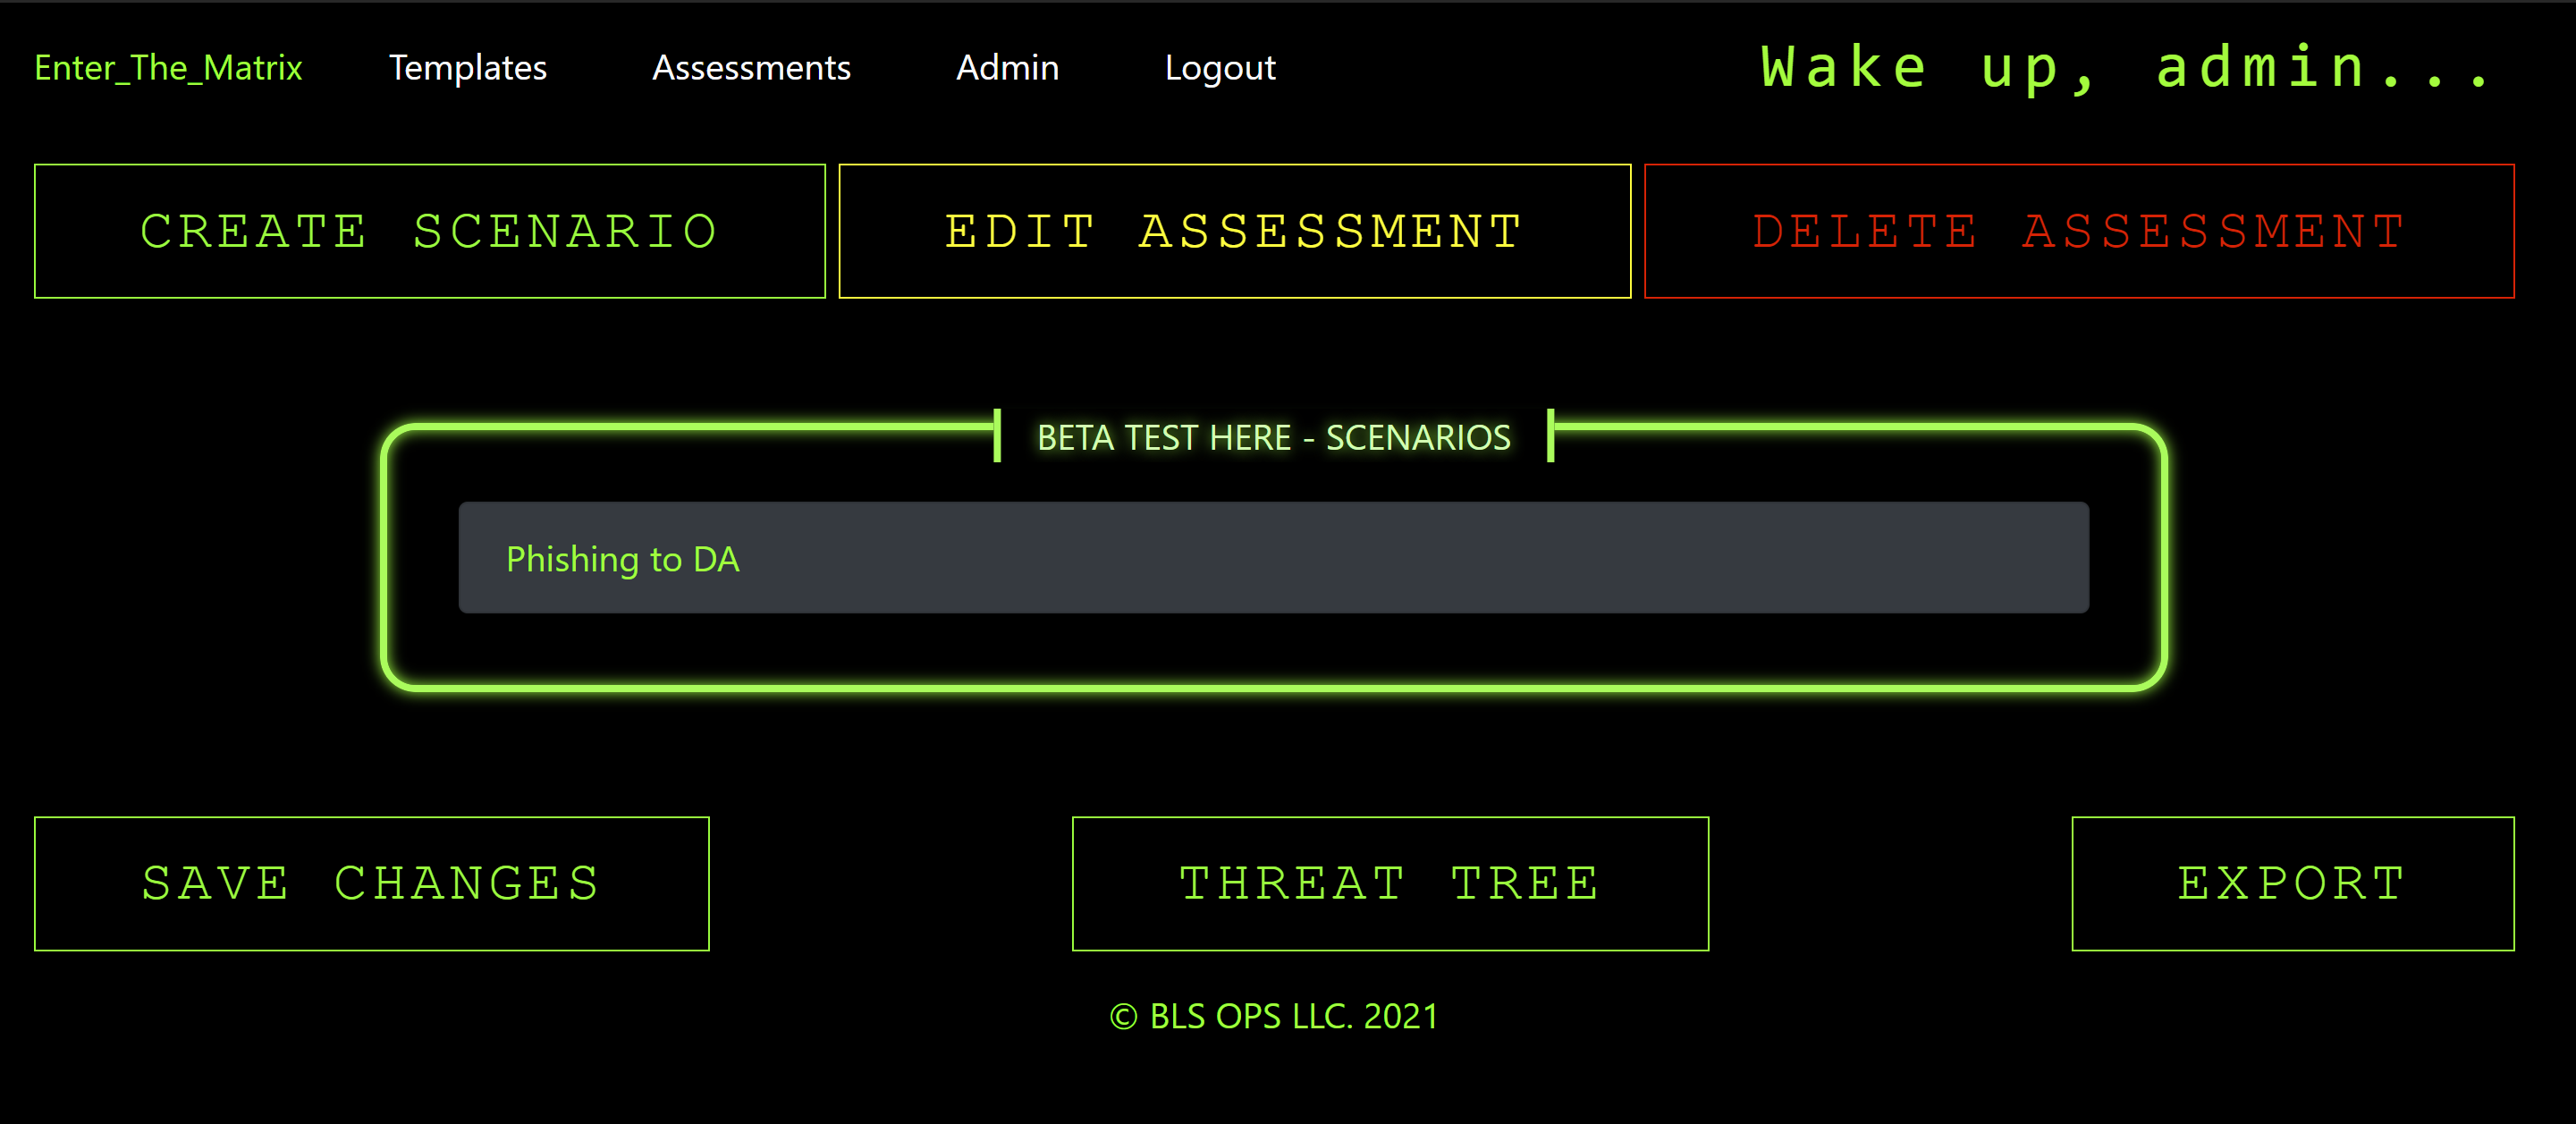
Scenario Page
After creating an assessment you will be brought to the Scenario page. You can also get to the Scenario page later by selecting the appropriate Assessment.
To create a new Scenario, click "CREATE SCENARIO" and provide a title for the new Scenario.
From the Scenario page, you are also able to edit the title of the Assessment by clicking "EDIT ASSESSMENT" or delete the Assessment by clicking "DELETE ASSESSMENT". Clicking the "THREAT TREES" button will allow you to create and edit the Threat Tree for your current assessment. Additionally, selecting "EXPORT" will prompt you to select how you want to export your Threat Matrix. You can choose either XLSX or PDF.
Scenarios are able to be re-ordered by clicking and dragging the Scenario element and releasing somewhere else in the list of Scenarios. This will determine the order that the Scenarios will be exported in the Threat Matrix Spreadsheet. Once the order is how you want it, click "SAVE CHANGES" to commit the ordering.
Editing an Event
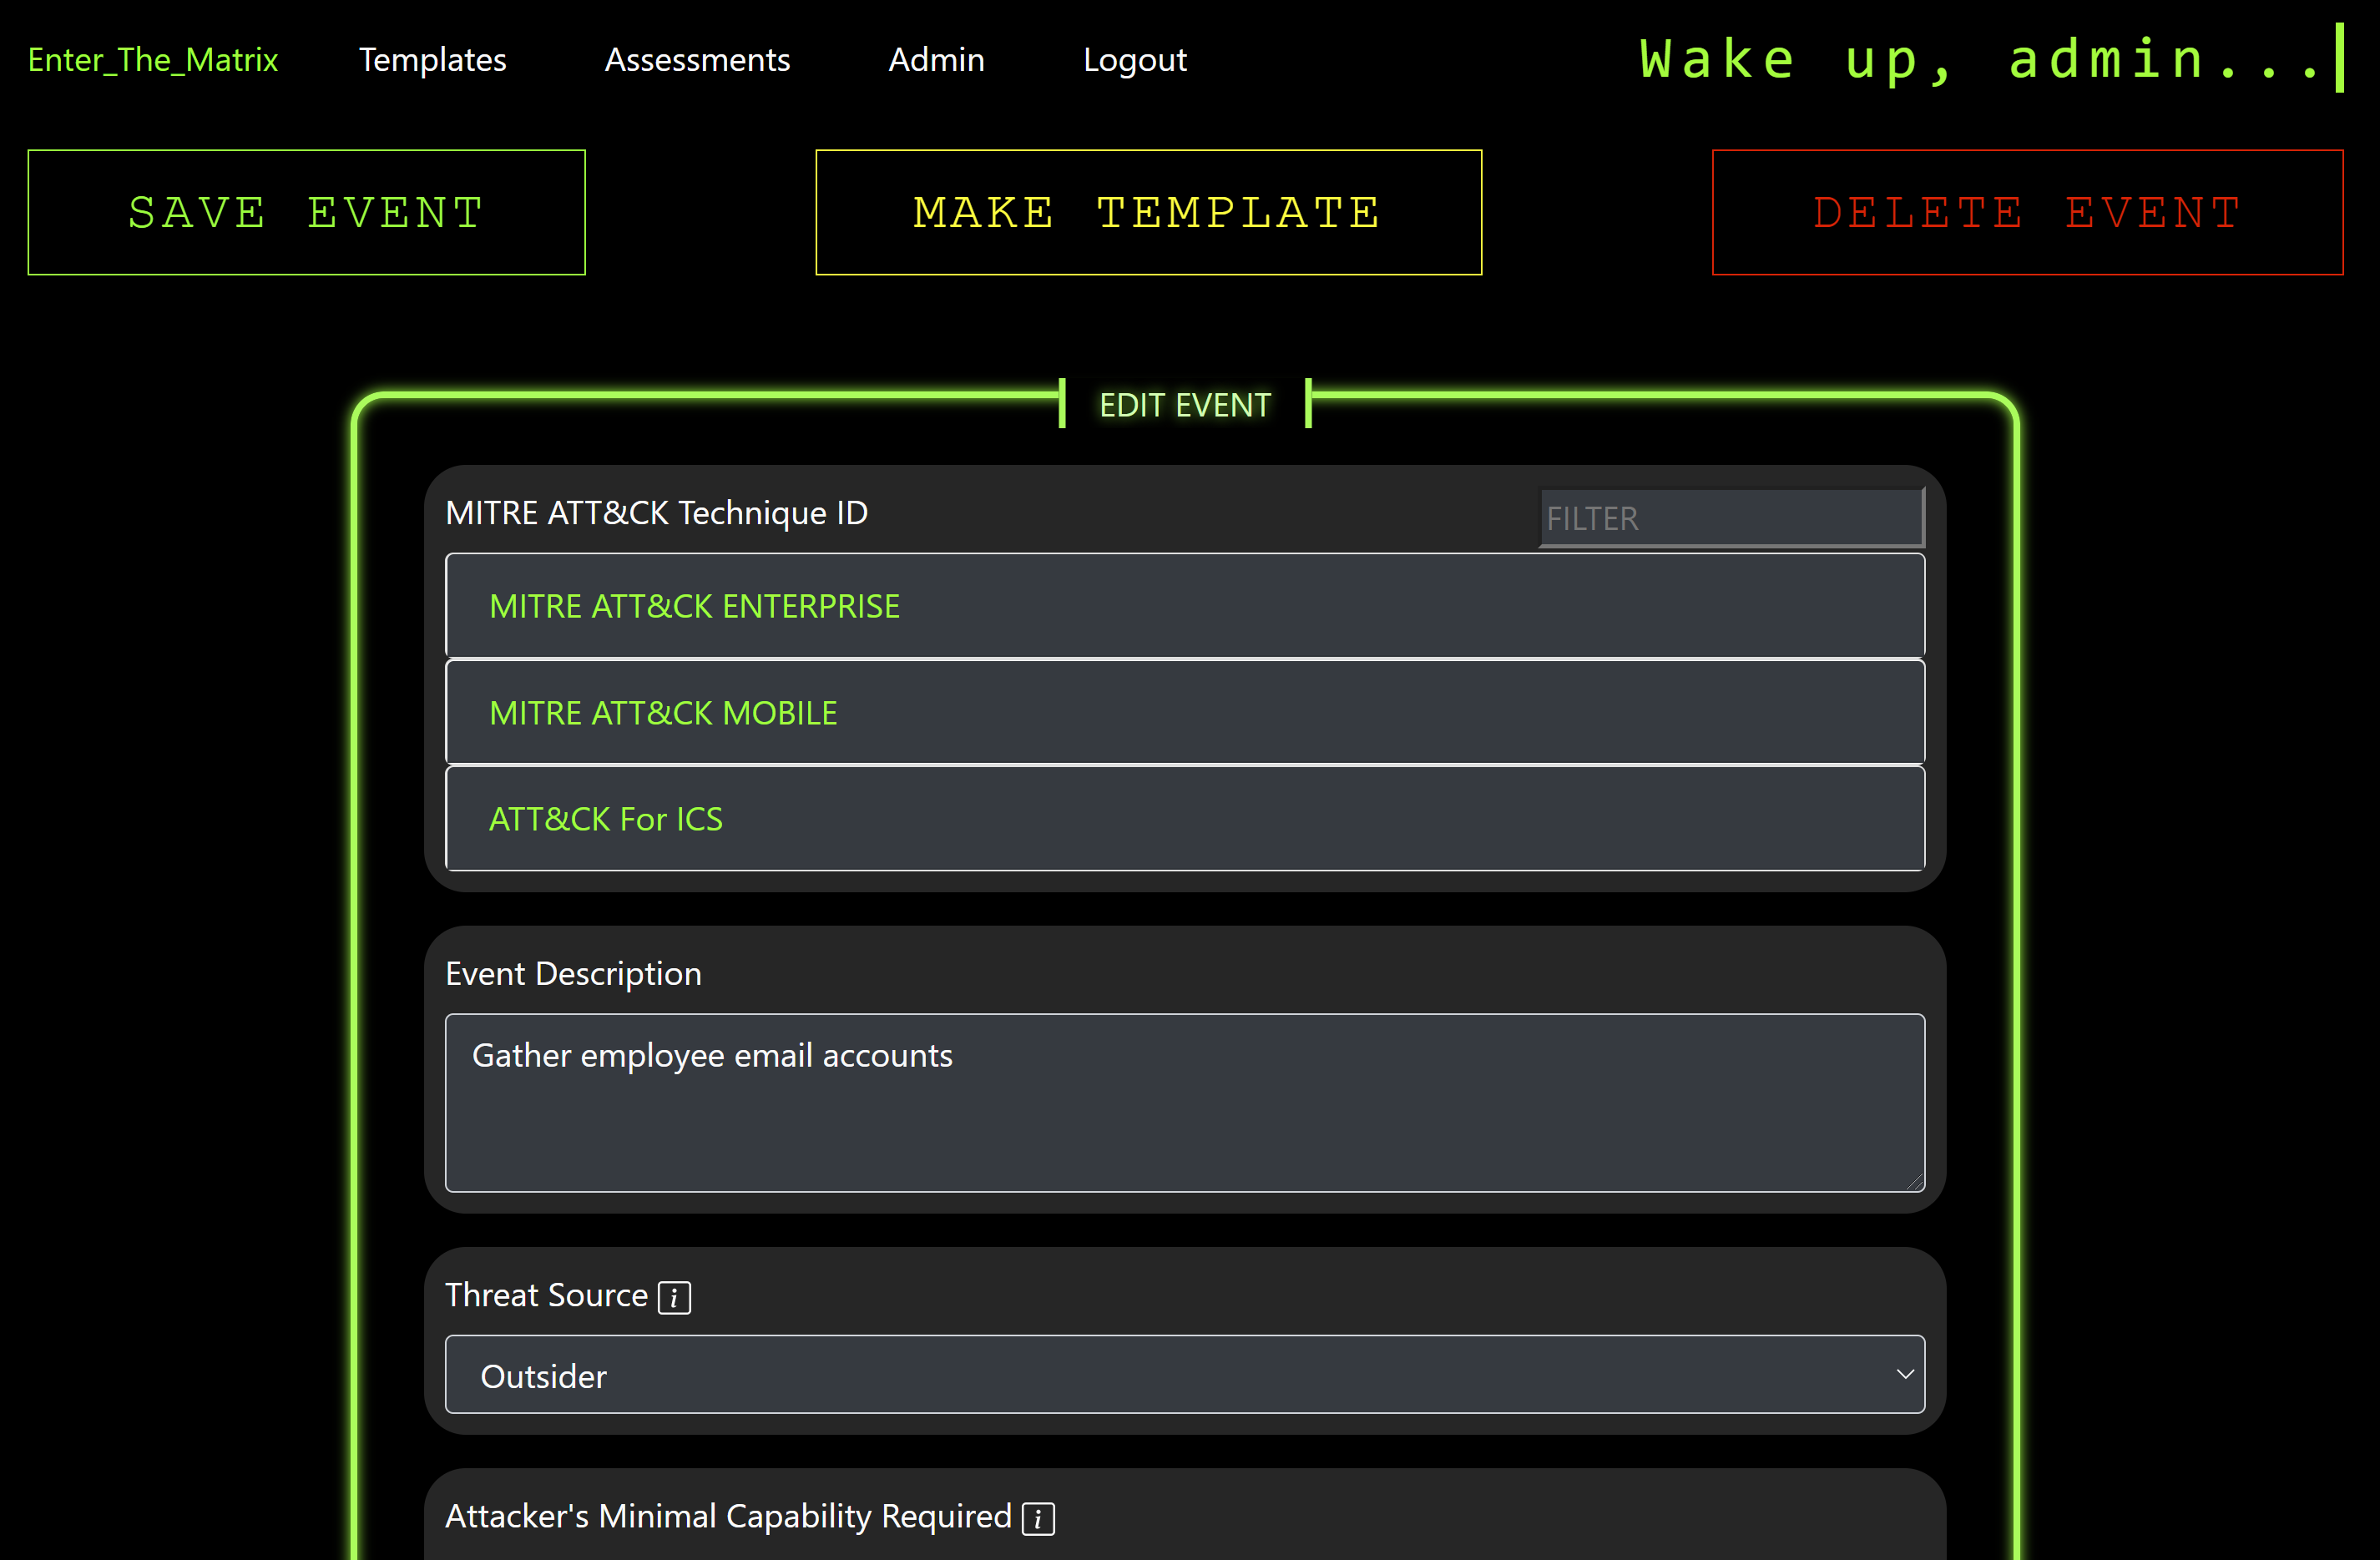
Editing an event
By selecting the "MAKE TEMPLATE" button, a new Template will be created using the current event and you will be taken to the Edit Template page to finalize any changes.
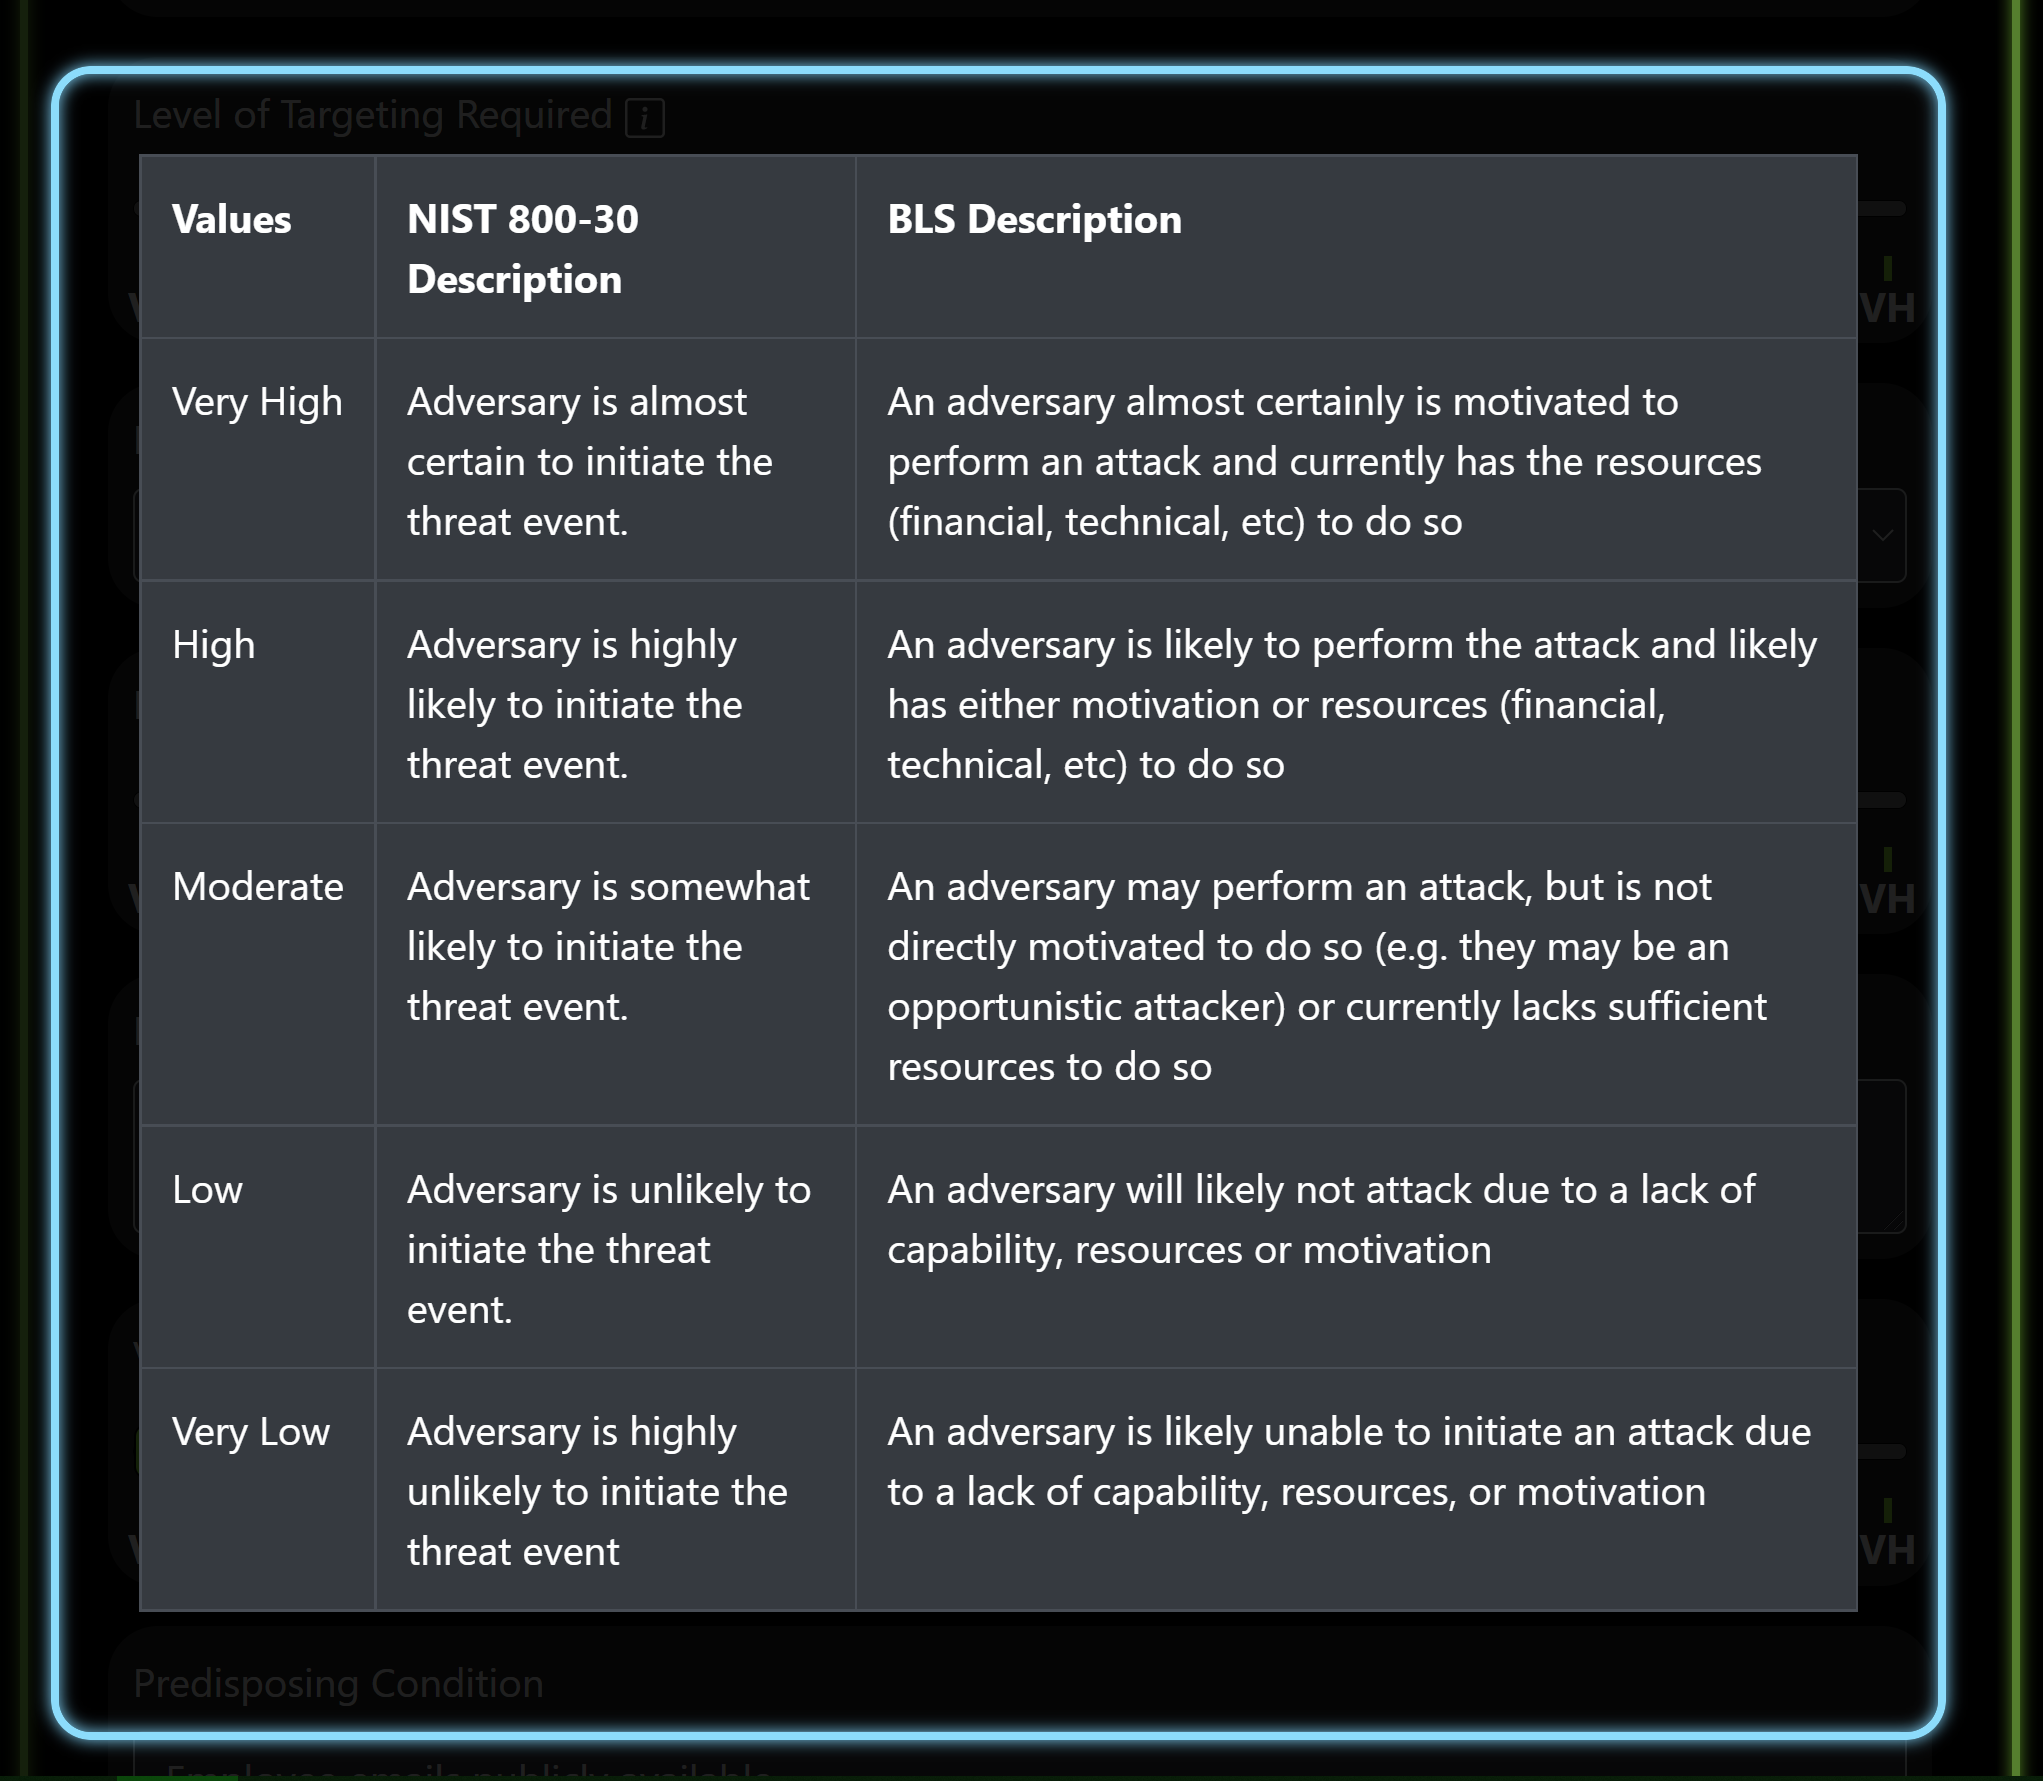
While filling in the individual factors for the event you are editing, you can take advantage of the helper info buttons on most of the factors. Clicking on these will display a modal overlay that contains the NIST descriptions for each severity level. BLS also includes our own interpretations of the NIST descriptions to help reduce any potential confusion.
MITRE ATT&CK IDs
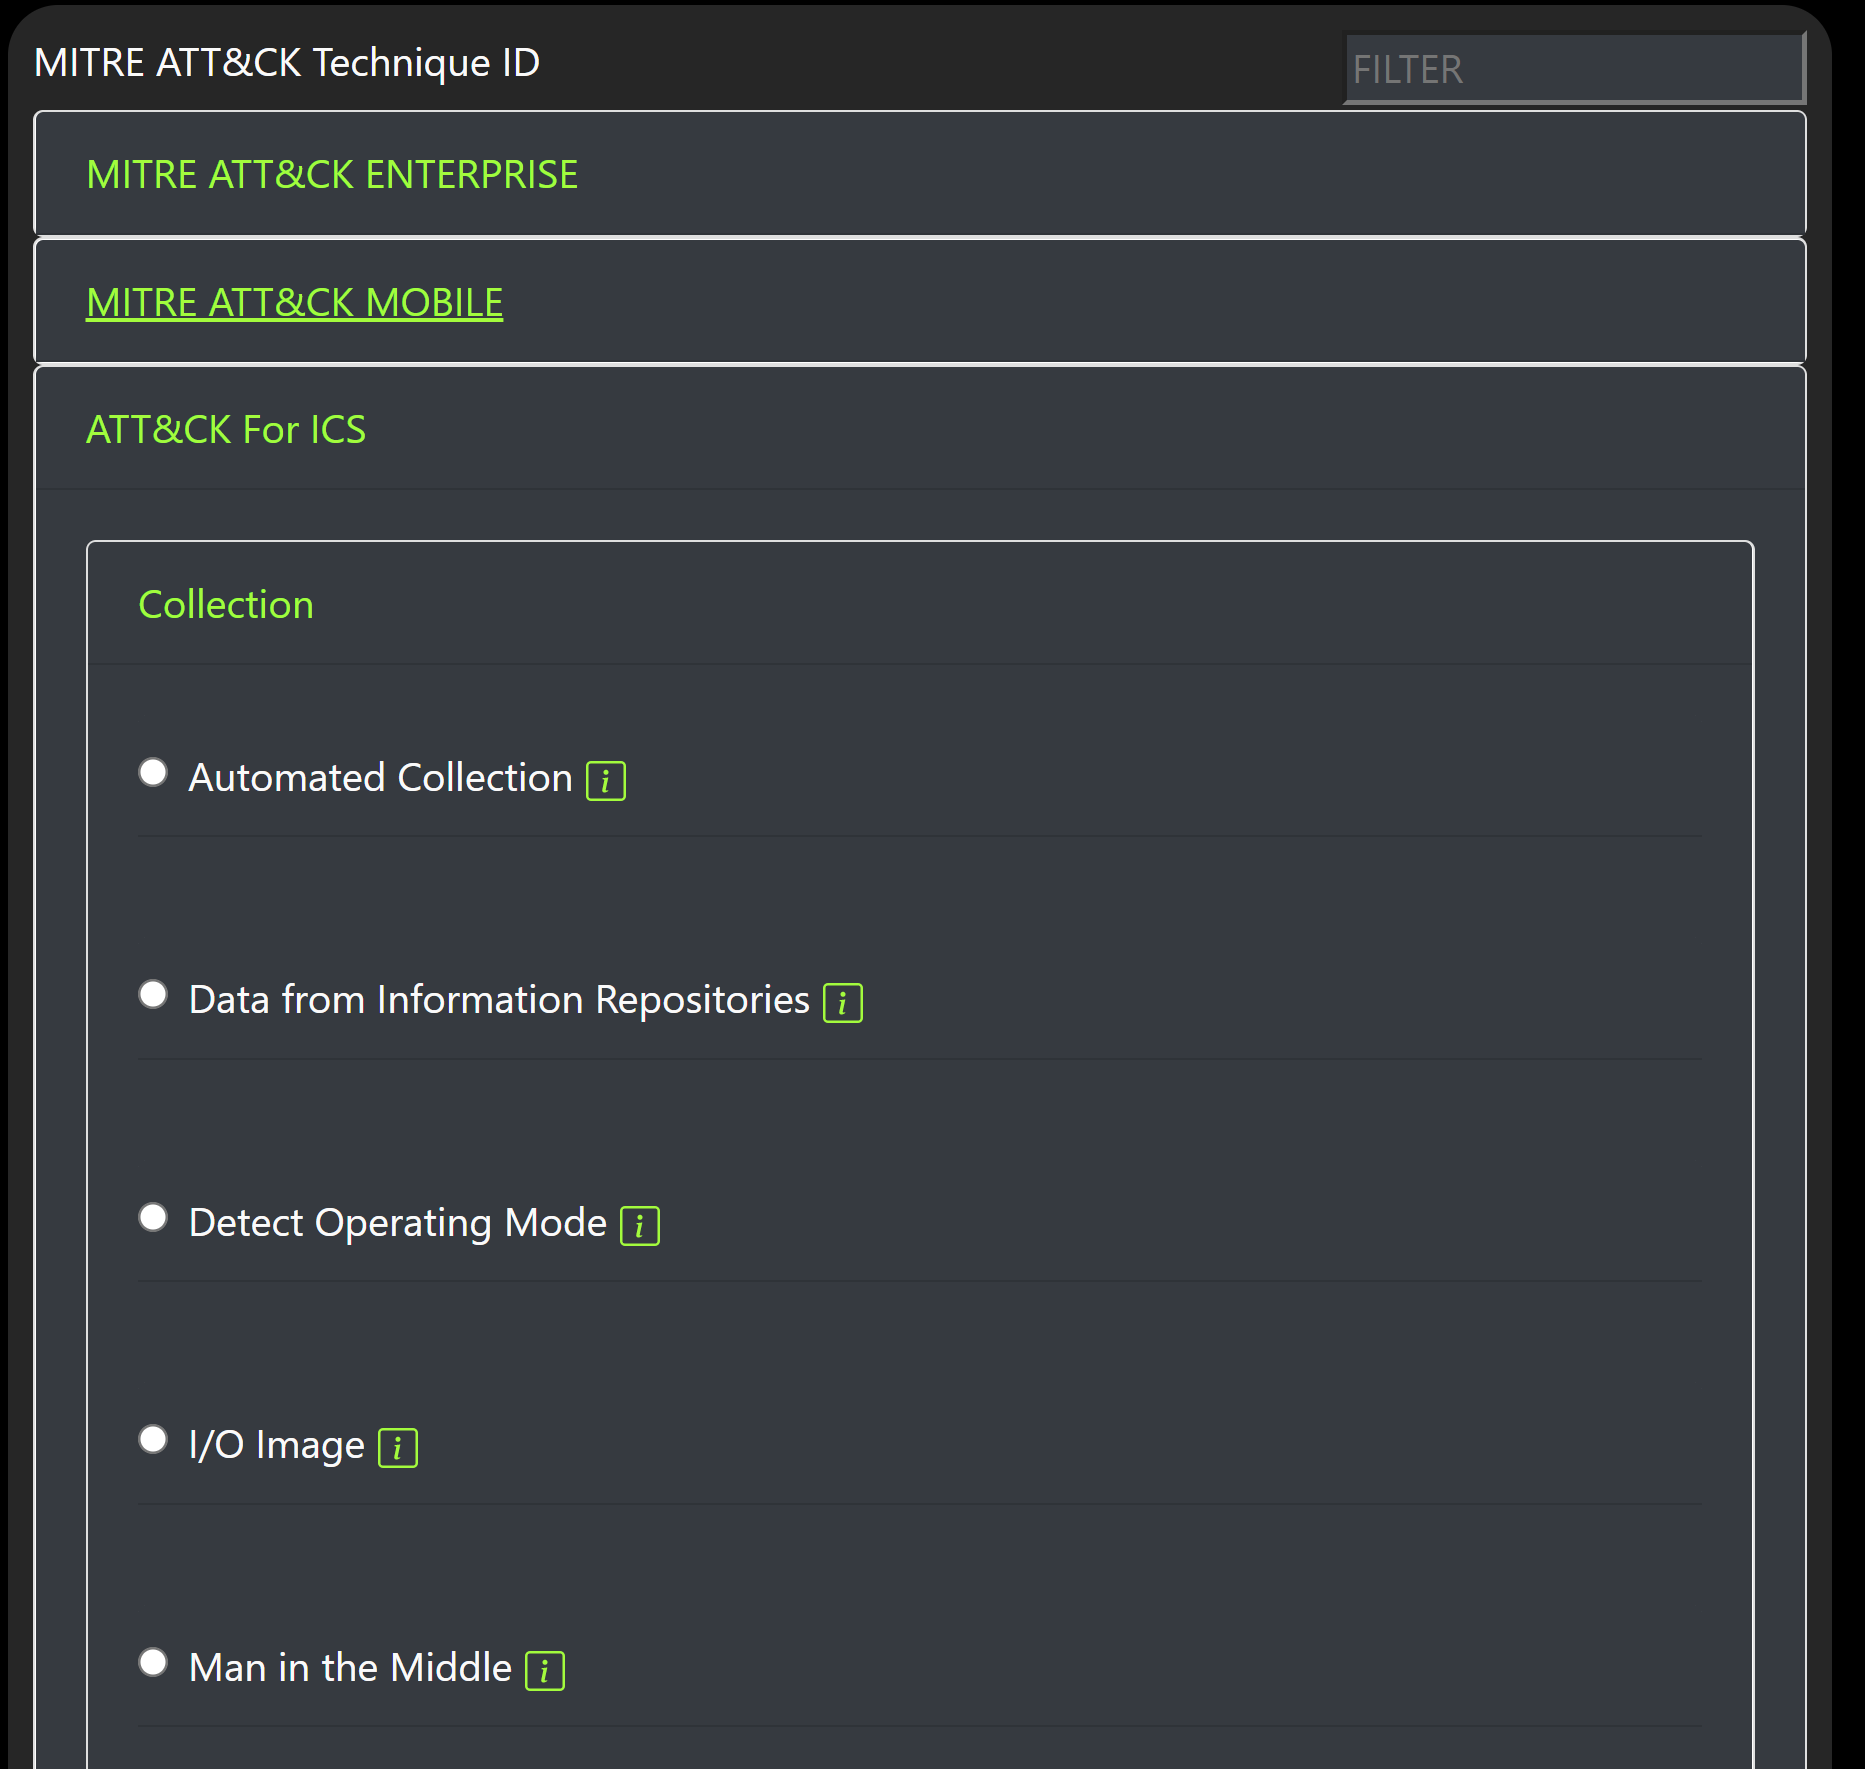
You are able to select an appropriate MITRE ATT&CK ID by selecting the category which expands displaying the various MITRE ATT&CK Tactics for that category. Selecting one of the tactics then displays the various Techniques under that Tactic.
Each Technique has a helper icon you can click on that will take you to that Technique's detailed information page on the MITRE website in a new tab.
These Techniques will be present in the exported Threat Matrix as IDs hyperlinked to the MITRE ATT&CK website for your clients to use in their remediation efforts.
If the intention is to create a Threat Tree for an assessment, it is necessary to select a MITRE ATT&CK ID for each event desired in the final Threat Tree. The unique ATT&CK IDs are collected to form the various nodes available to the user while creating a tree.
Threat Sources
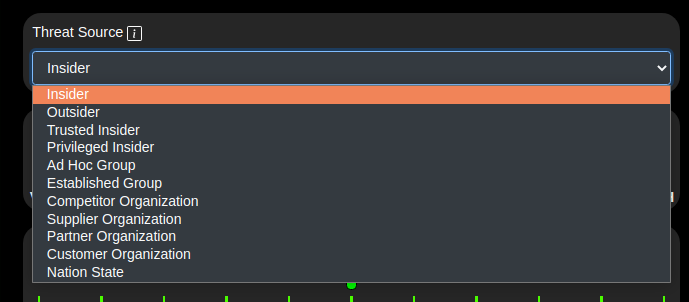
The threat sources presented in the list box are pulled from NIST guidelines on conducting a Risk Assessment.
Relevance to Findings
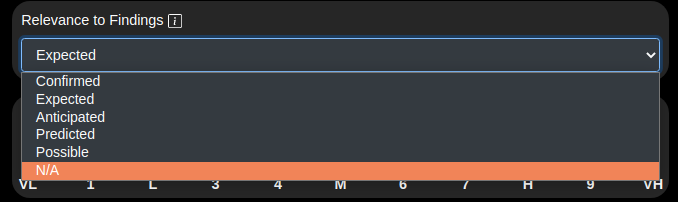
Each Event should have some relevance to technical findings during your assessment.
Automatic Risk Calculation
Based on your entries into this page, two factors are automatically calculated (Overall Likelihood and Risk) for you to avoid biasing outcomes.
How Risk is Calculated
NIST provides the information needed to properly calculate Risk. Three factors directly contribute to the final Risk value. These include Likelihood of Attack Initiation, Likelihood of Adverse Impact, and Level of Impact. The Likelihood factors are combined to form the Overall Likelihood value. Risk is then calculated based on combining the Overall Likelihood value and the Level of Impact value.
Finding Reference/Vulnerability Severity and Predisposing Condition/Pervasiveness of Predisposing Condition
NIST provides guidance on quantifying a Severity and Pervasiveness factor for a particular event. To make this more obvious and understandable, these have been broken out into separate fields. If a Finding Reference is not supplied, then the Vulnerability Severity slider will not be activated. Similarly, if a Predisposing Condition is not provided then the matching Pervasiveness of Predisposing Condition slider will be deactivated.
If only one of these are filled in, then the overall Severity and Pervasiveness factor in the exported Threat Matrix will be taken from the one enabled. If both are provided, then an average is taken of the two and floored.
Graph Elements
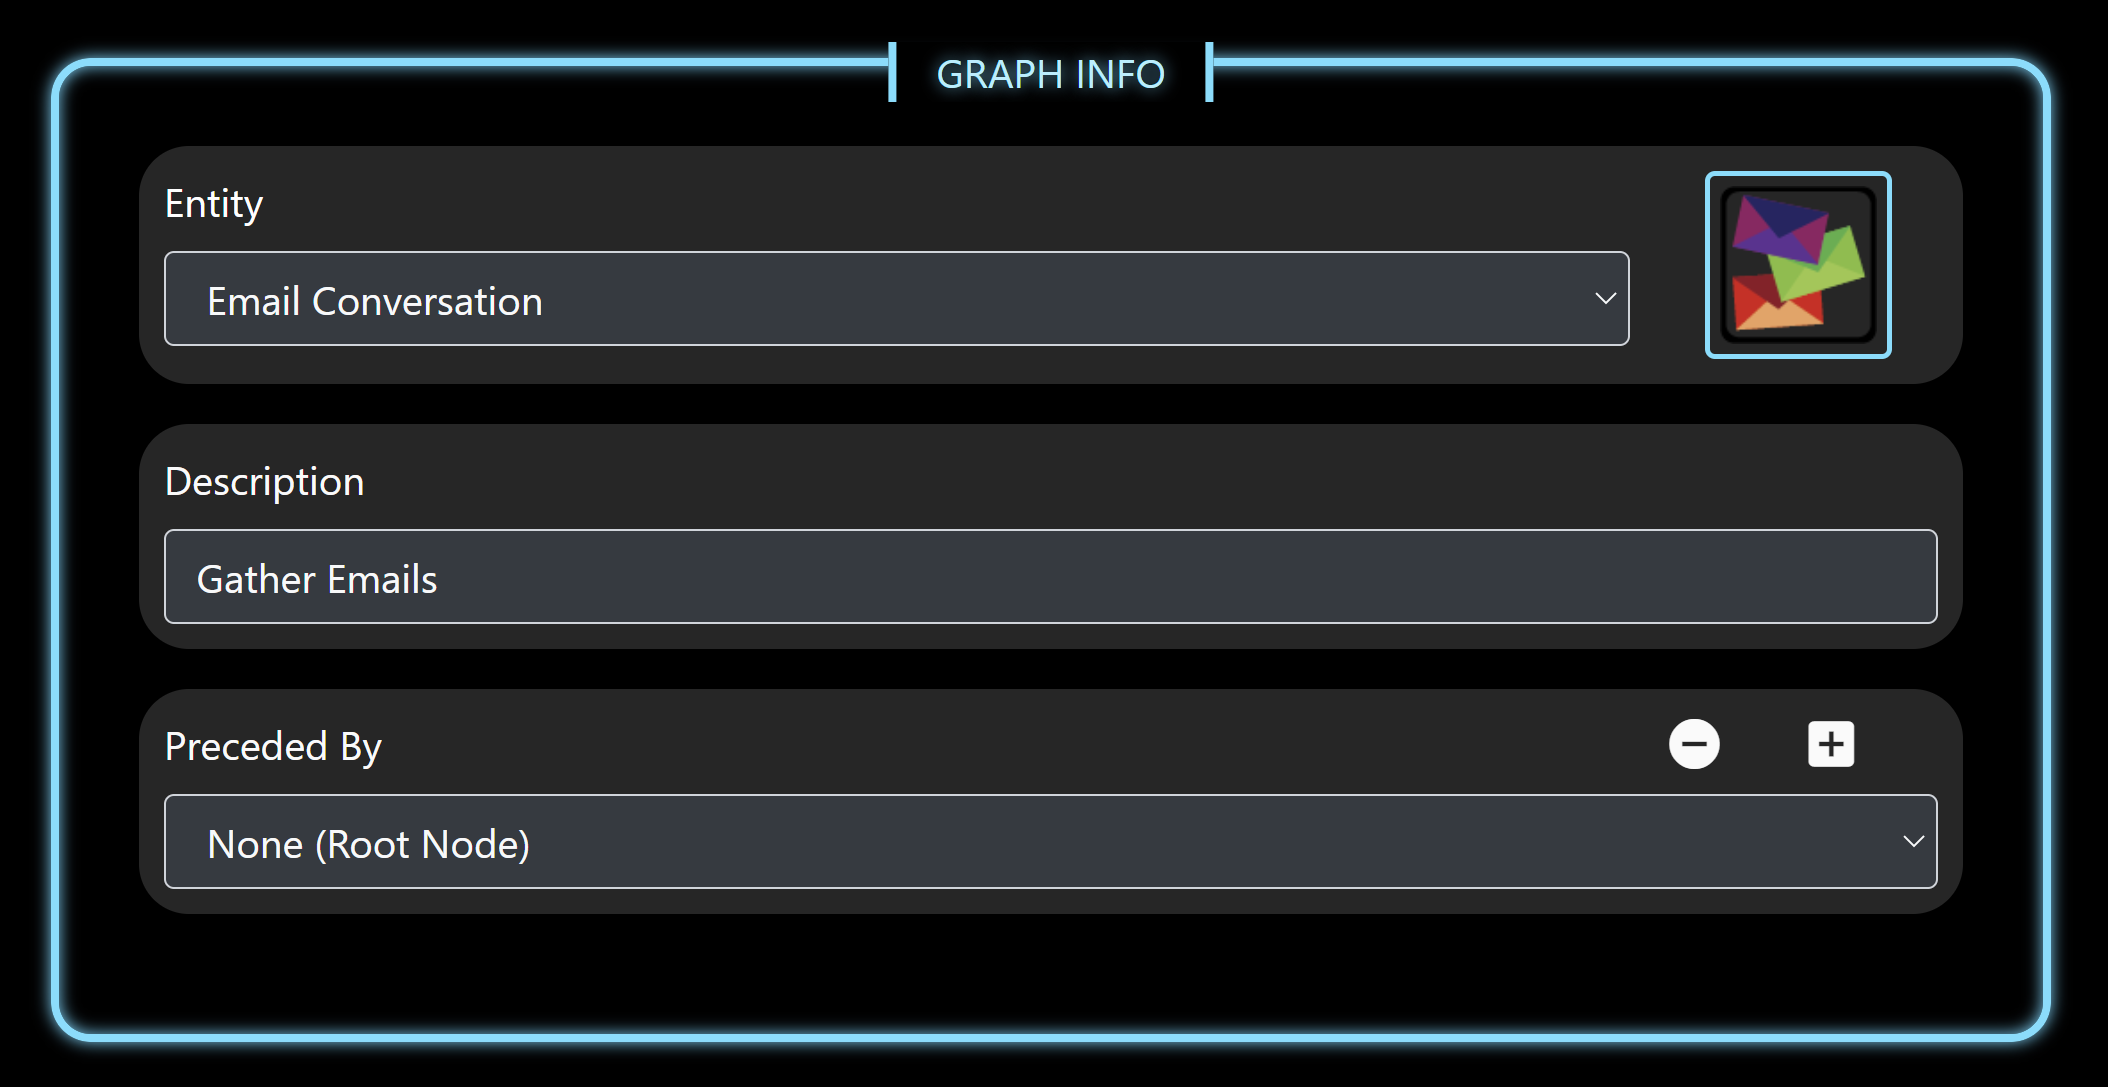
To create a graph export of your Scenarios, you will need to provide information for each event.
Entity
The Entity you choose here will determine the graph node image displayed in the exported graph.
Description
The Description you provide will become the label underneath the graph image in the exported graph.
Preceded by
This list contains each event already present in the current Scenario. If there are no events that precede this one, or you want this particular event to be tied directly to the Root Node (the Attacker Node), then you can select None (Root Node). Otherwise, selecting one of the other events in the list will make that event the parent to the one you are currently editing.
It is also possible to have multiple preceded by values. This gives the user the ability to make more complex graphs showing multiple events leading to a single consequence, or singular events leading to multiple simultaneous consequences.
Creating a Template
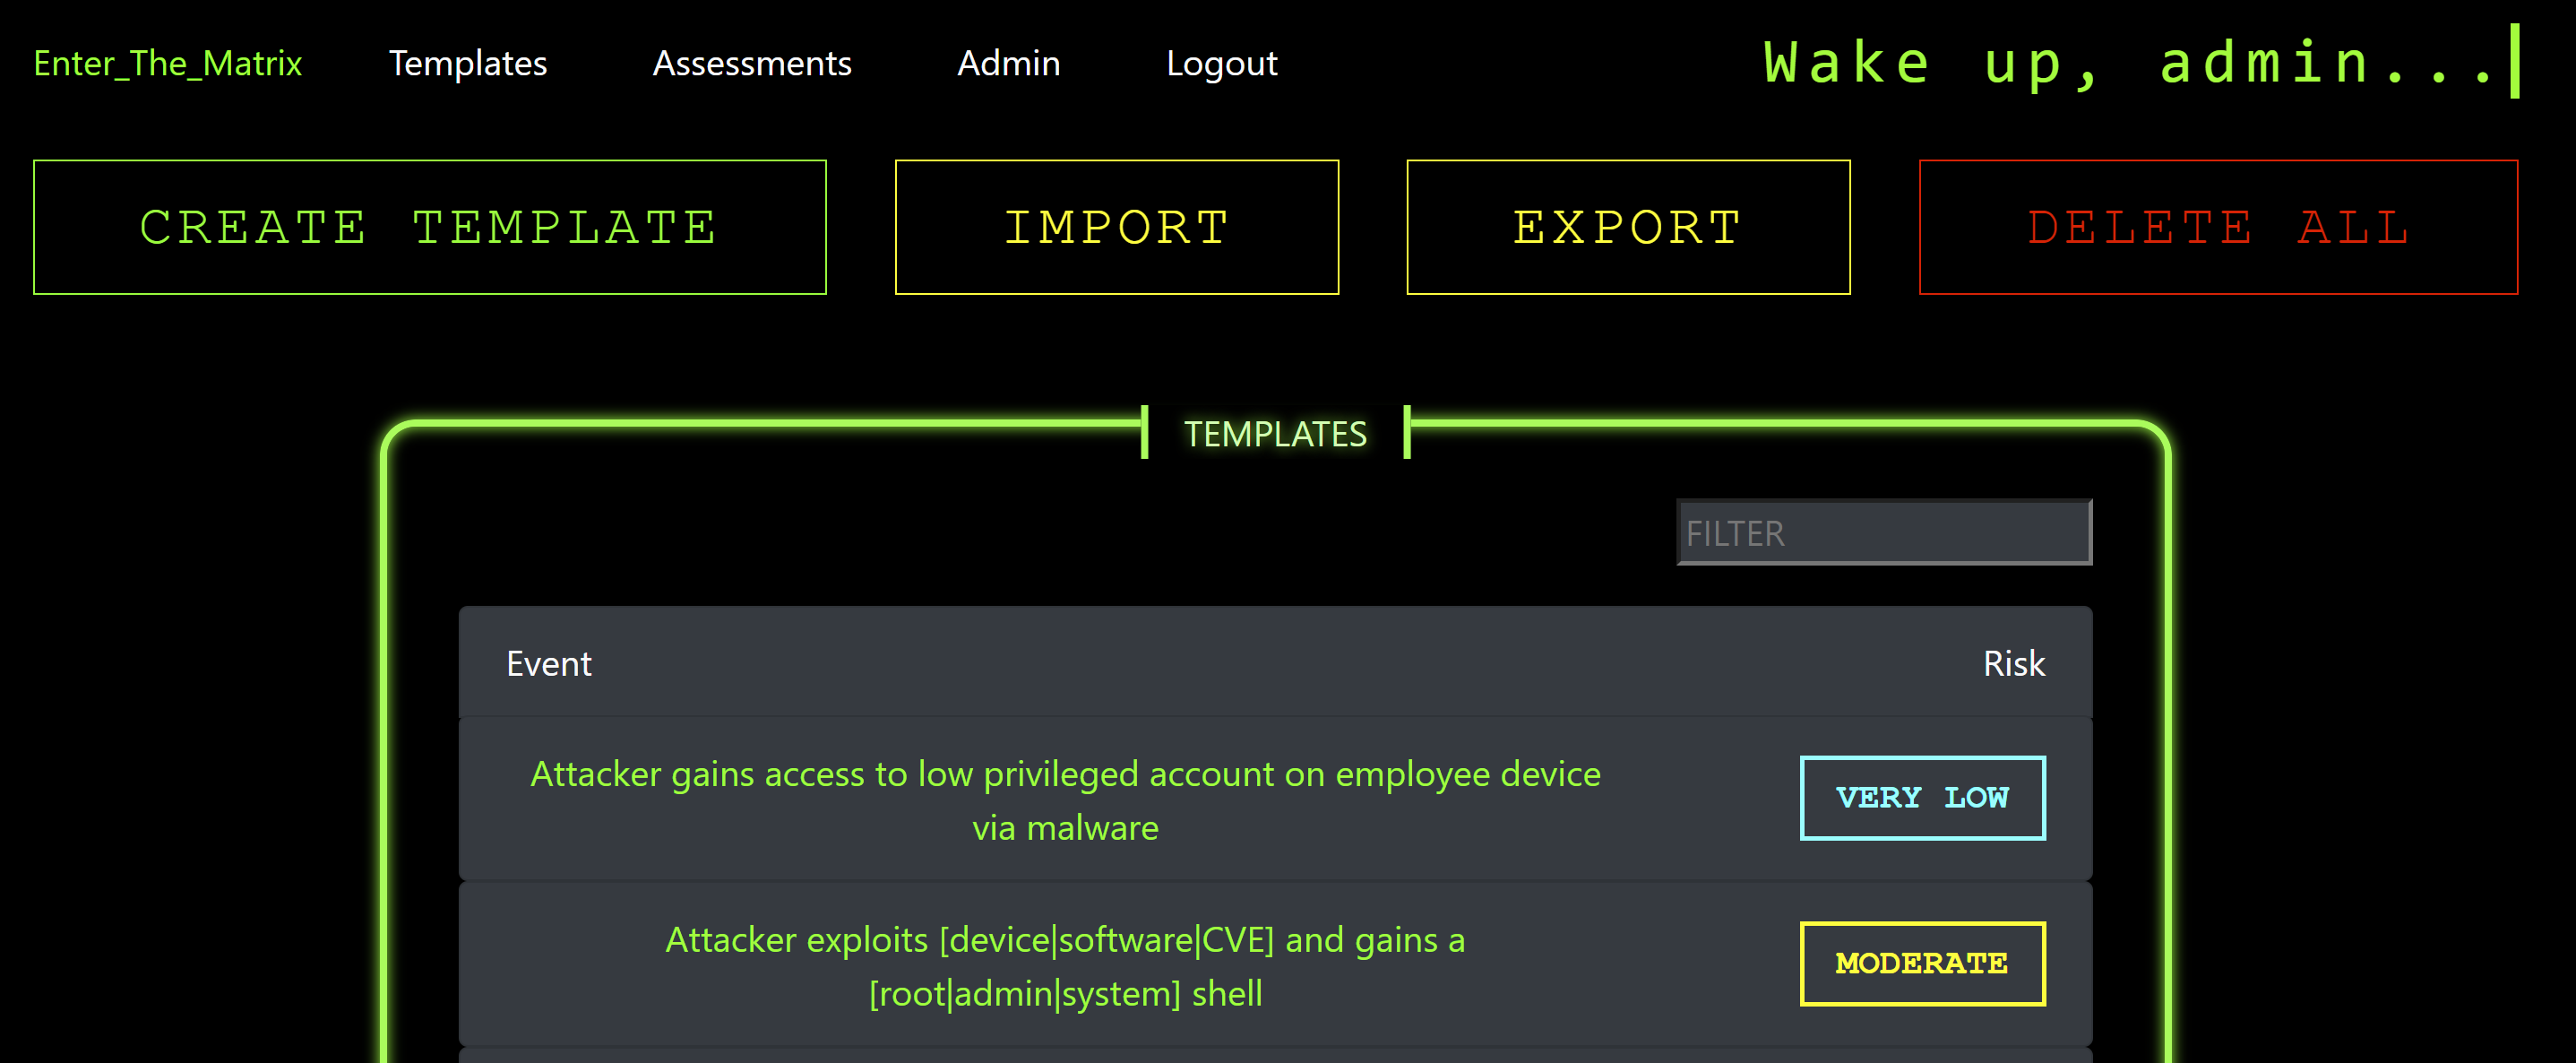
Templates Page
To create a Template, navigate to the Templates page. Once there, you can click "CREATE TEMPLATE". This will create a new blank Template and bring you to the Template editing page.
On this page, there is also an "IMPORT" button which will prompt you to select a proper template pack JSON file. Uploading the file will generate templates from the contents. To view the proper structure of the JSON file, it is recommended to first create a few Templates using the GUI and then export the templates using the "EXPORT" button.
The "DELETE ALL" button will prompt you to confirm you want to remove all templates from the database. Once confirmed, they are removed.
Editing a Template
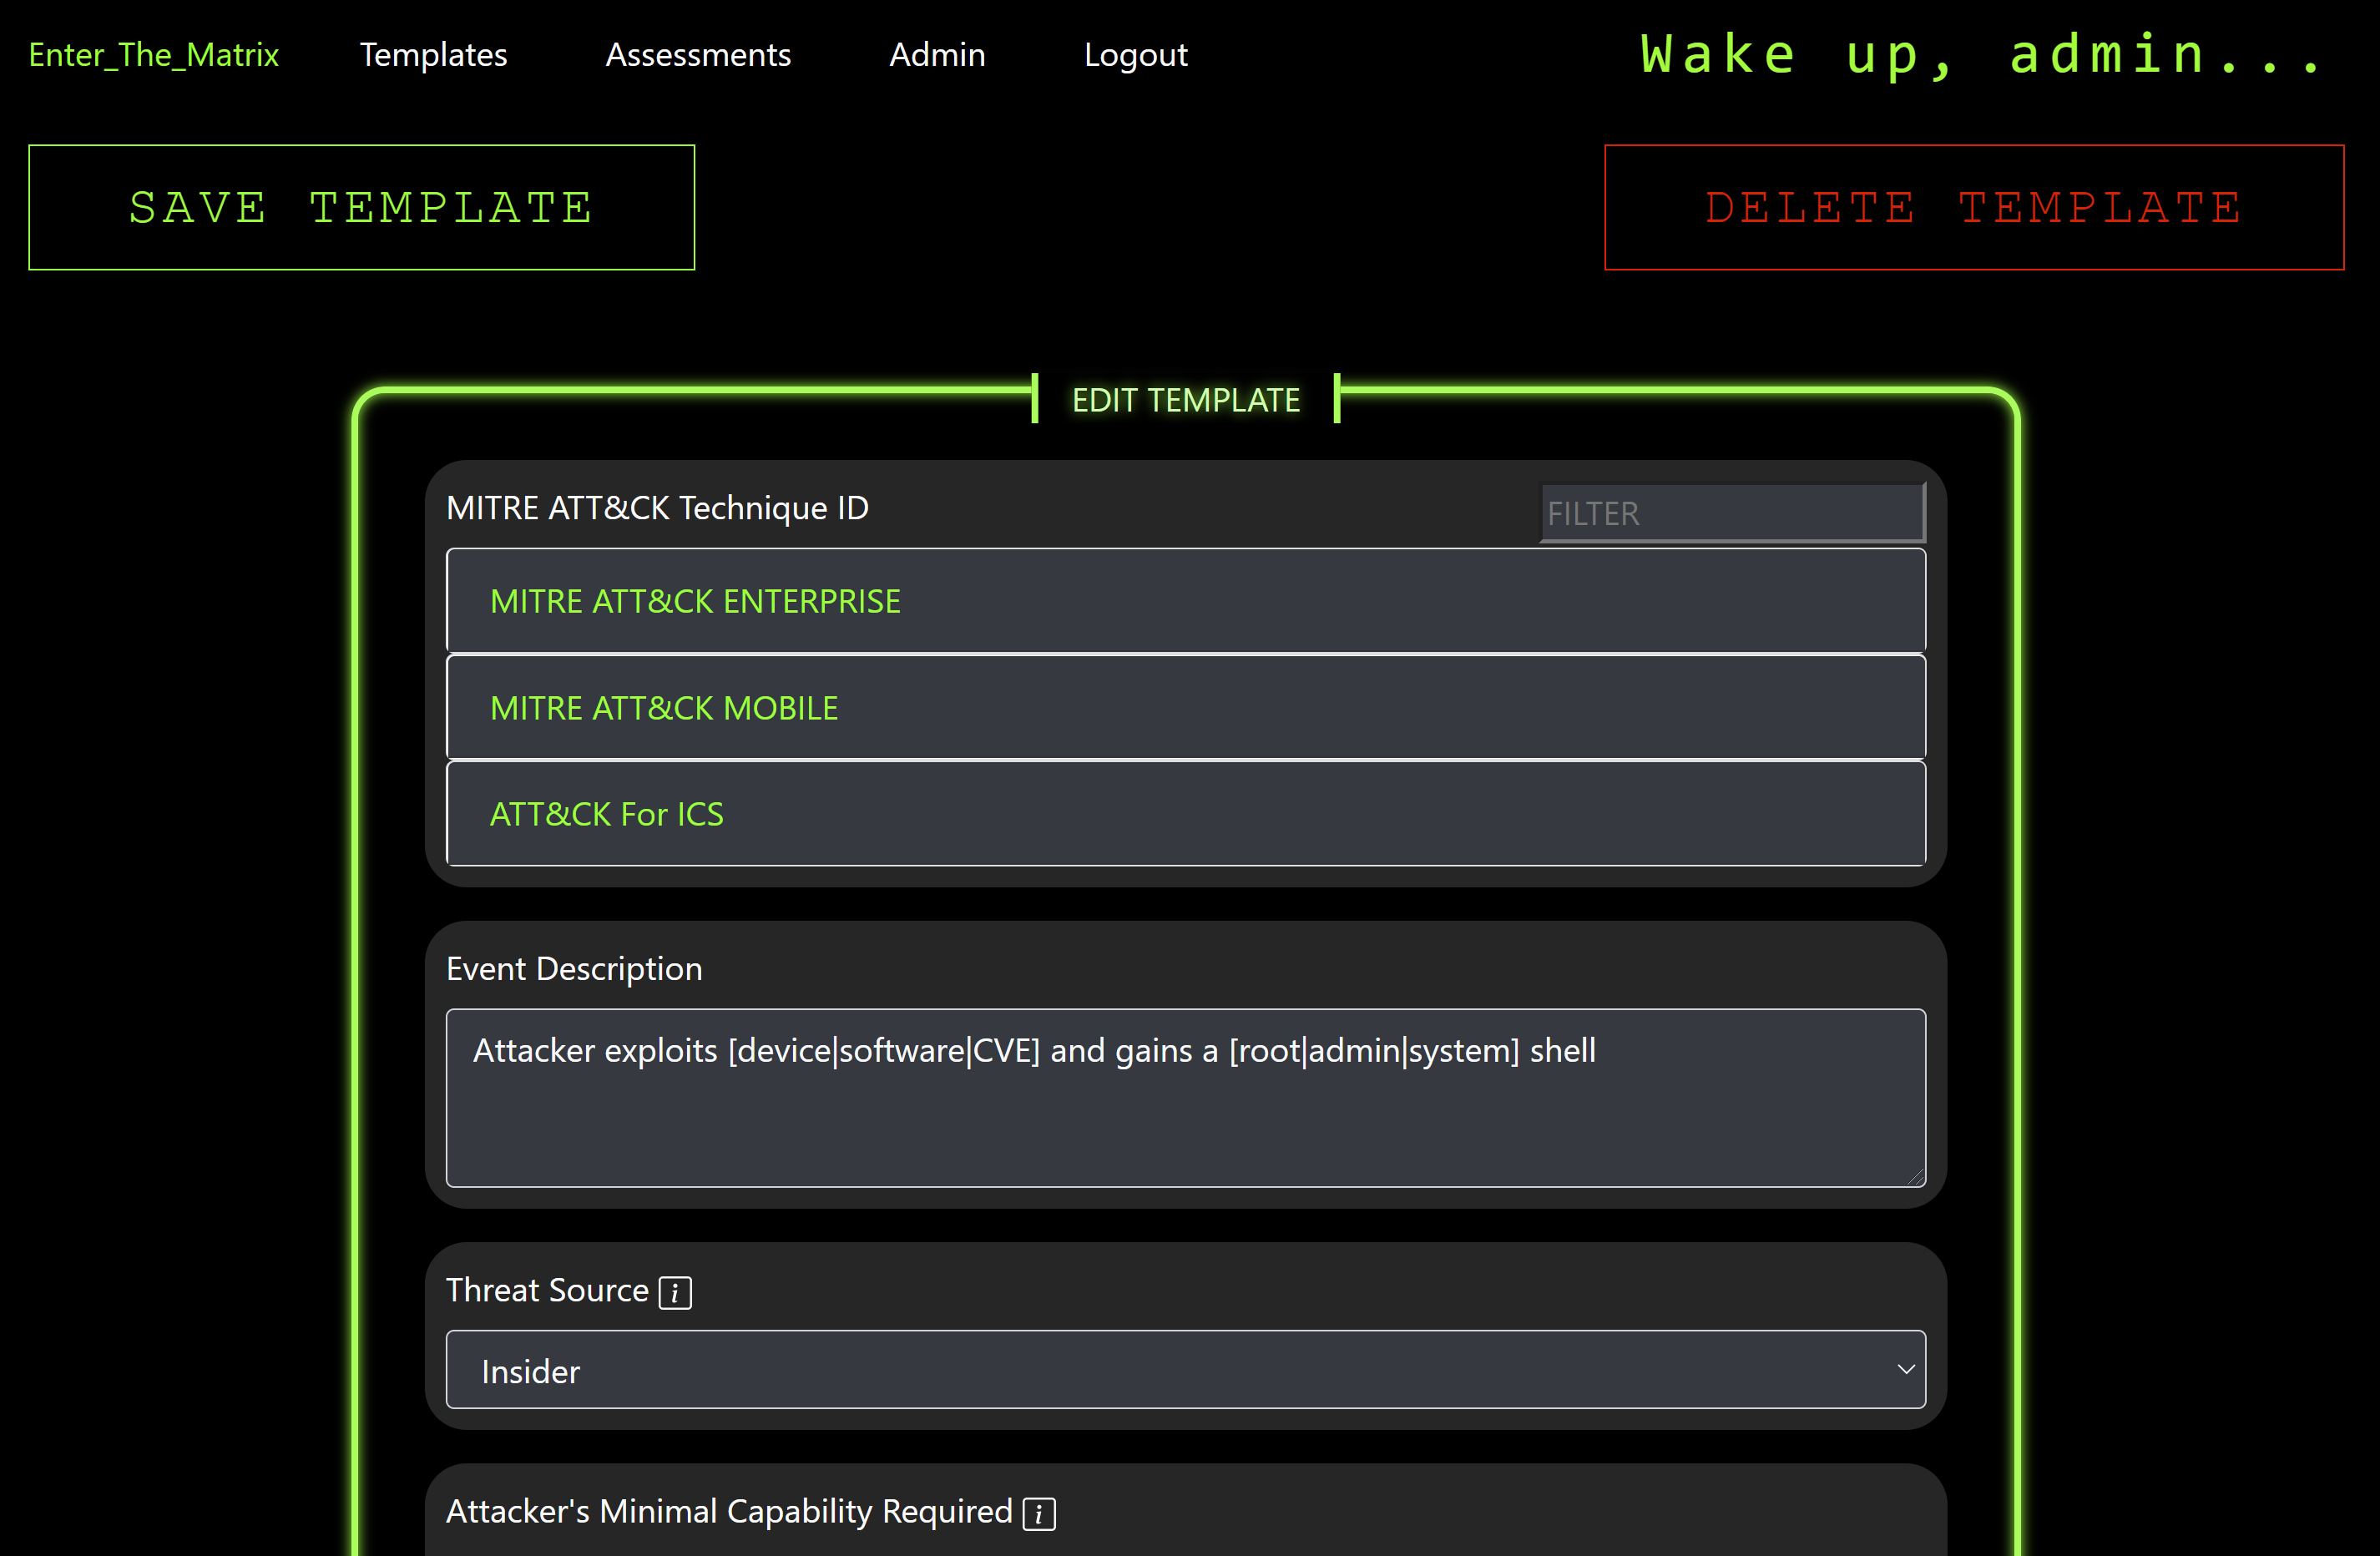
Editing a Template is an identical process to editing an Event, however certain considerations should likely be made to make these as reusable as possible. This should allow you to maintain more consistency in quantifying event factors.
Exporting Graphs
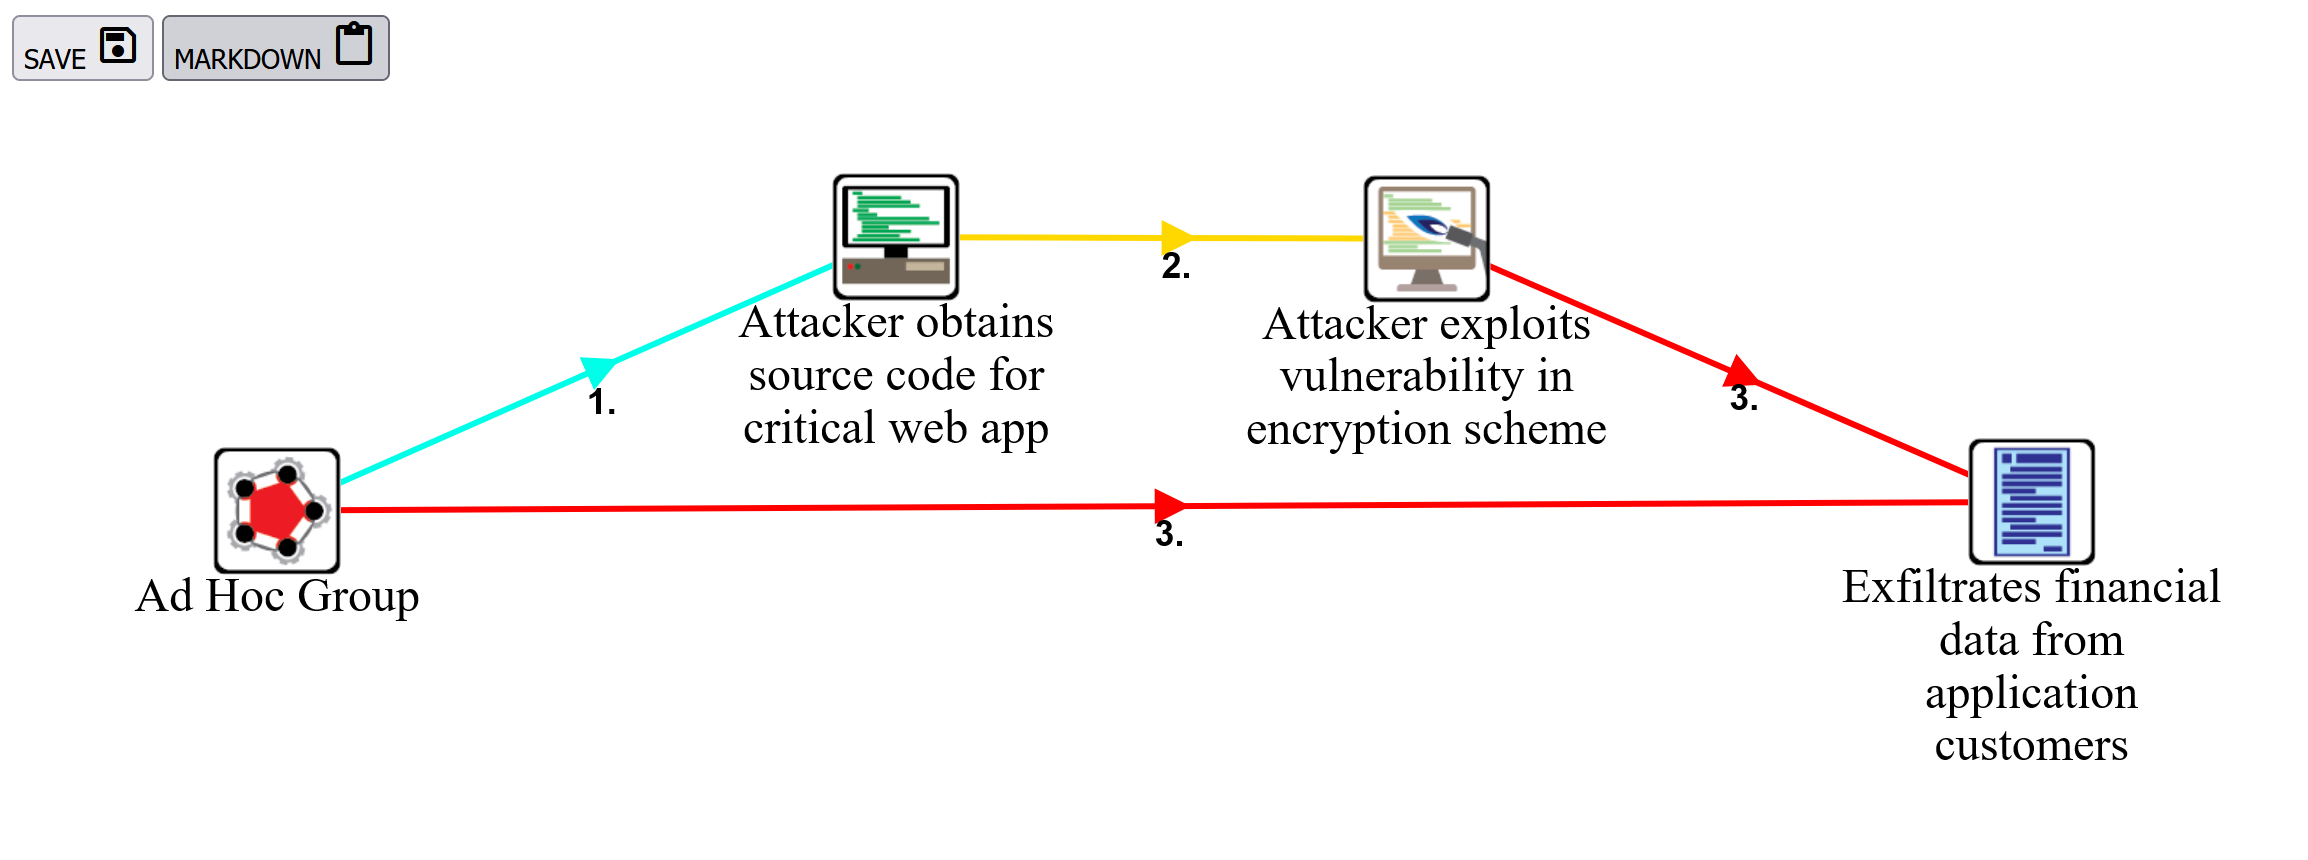
Generated Threat Graph
To export a Threat Graph for a specific Scenario, select the Assessment that the Scenario belongs to. From the Scenarios page, select the Scenario you want to export as a graph. From the Events page, click the "EXPORT GRAPH" button. This generates a graph using GraphViz in the background, and displays the resulting graph in the browser. The graph will have a transparent background once saved so it may be used in other reporting materials as supportive information. Also included is a simple markdown table that is populated with the event descriptions the user provided. These descriptions give the graph edge's more context. The table is written in markdown for easy inclusion with reporting tools.
To return to the application, use your browser's back button or click the "BACK" button.
Exporting Threat Matrix Spreadsheet
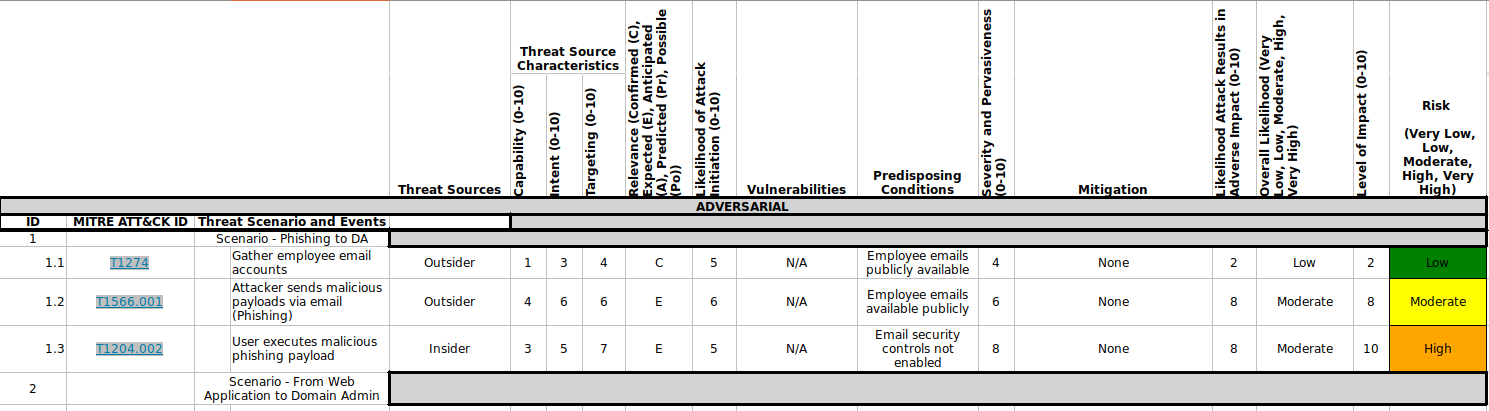
Threat Matrix Spreadsheet
To export your Assessment to a Threat Matrix Spreadsheet, select the Assessment you want to export. Then, from the Scenarios page, click "EXPORT" followed by "XLSX". The default title for the exported spreadsheet will be AssessmentTitle_ThreatMatrix_YYYY_MM_DD. Exported XSLX documents are "living". This means that as the document is updated following remediation/mitigation efforts, the values for Overall Likelihood and Risk will be automatically adjusted to reflect those efforts.
Exporting Threat Matrix PDF
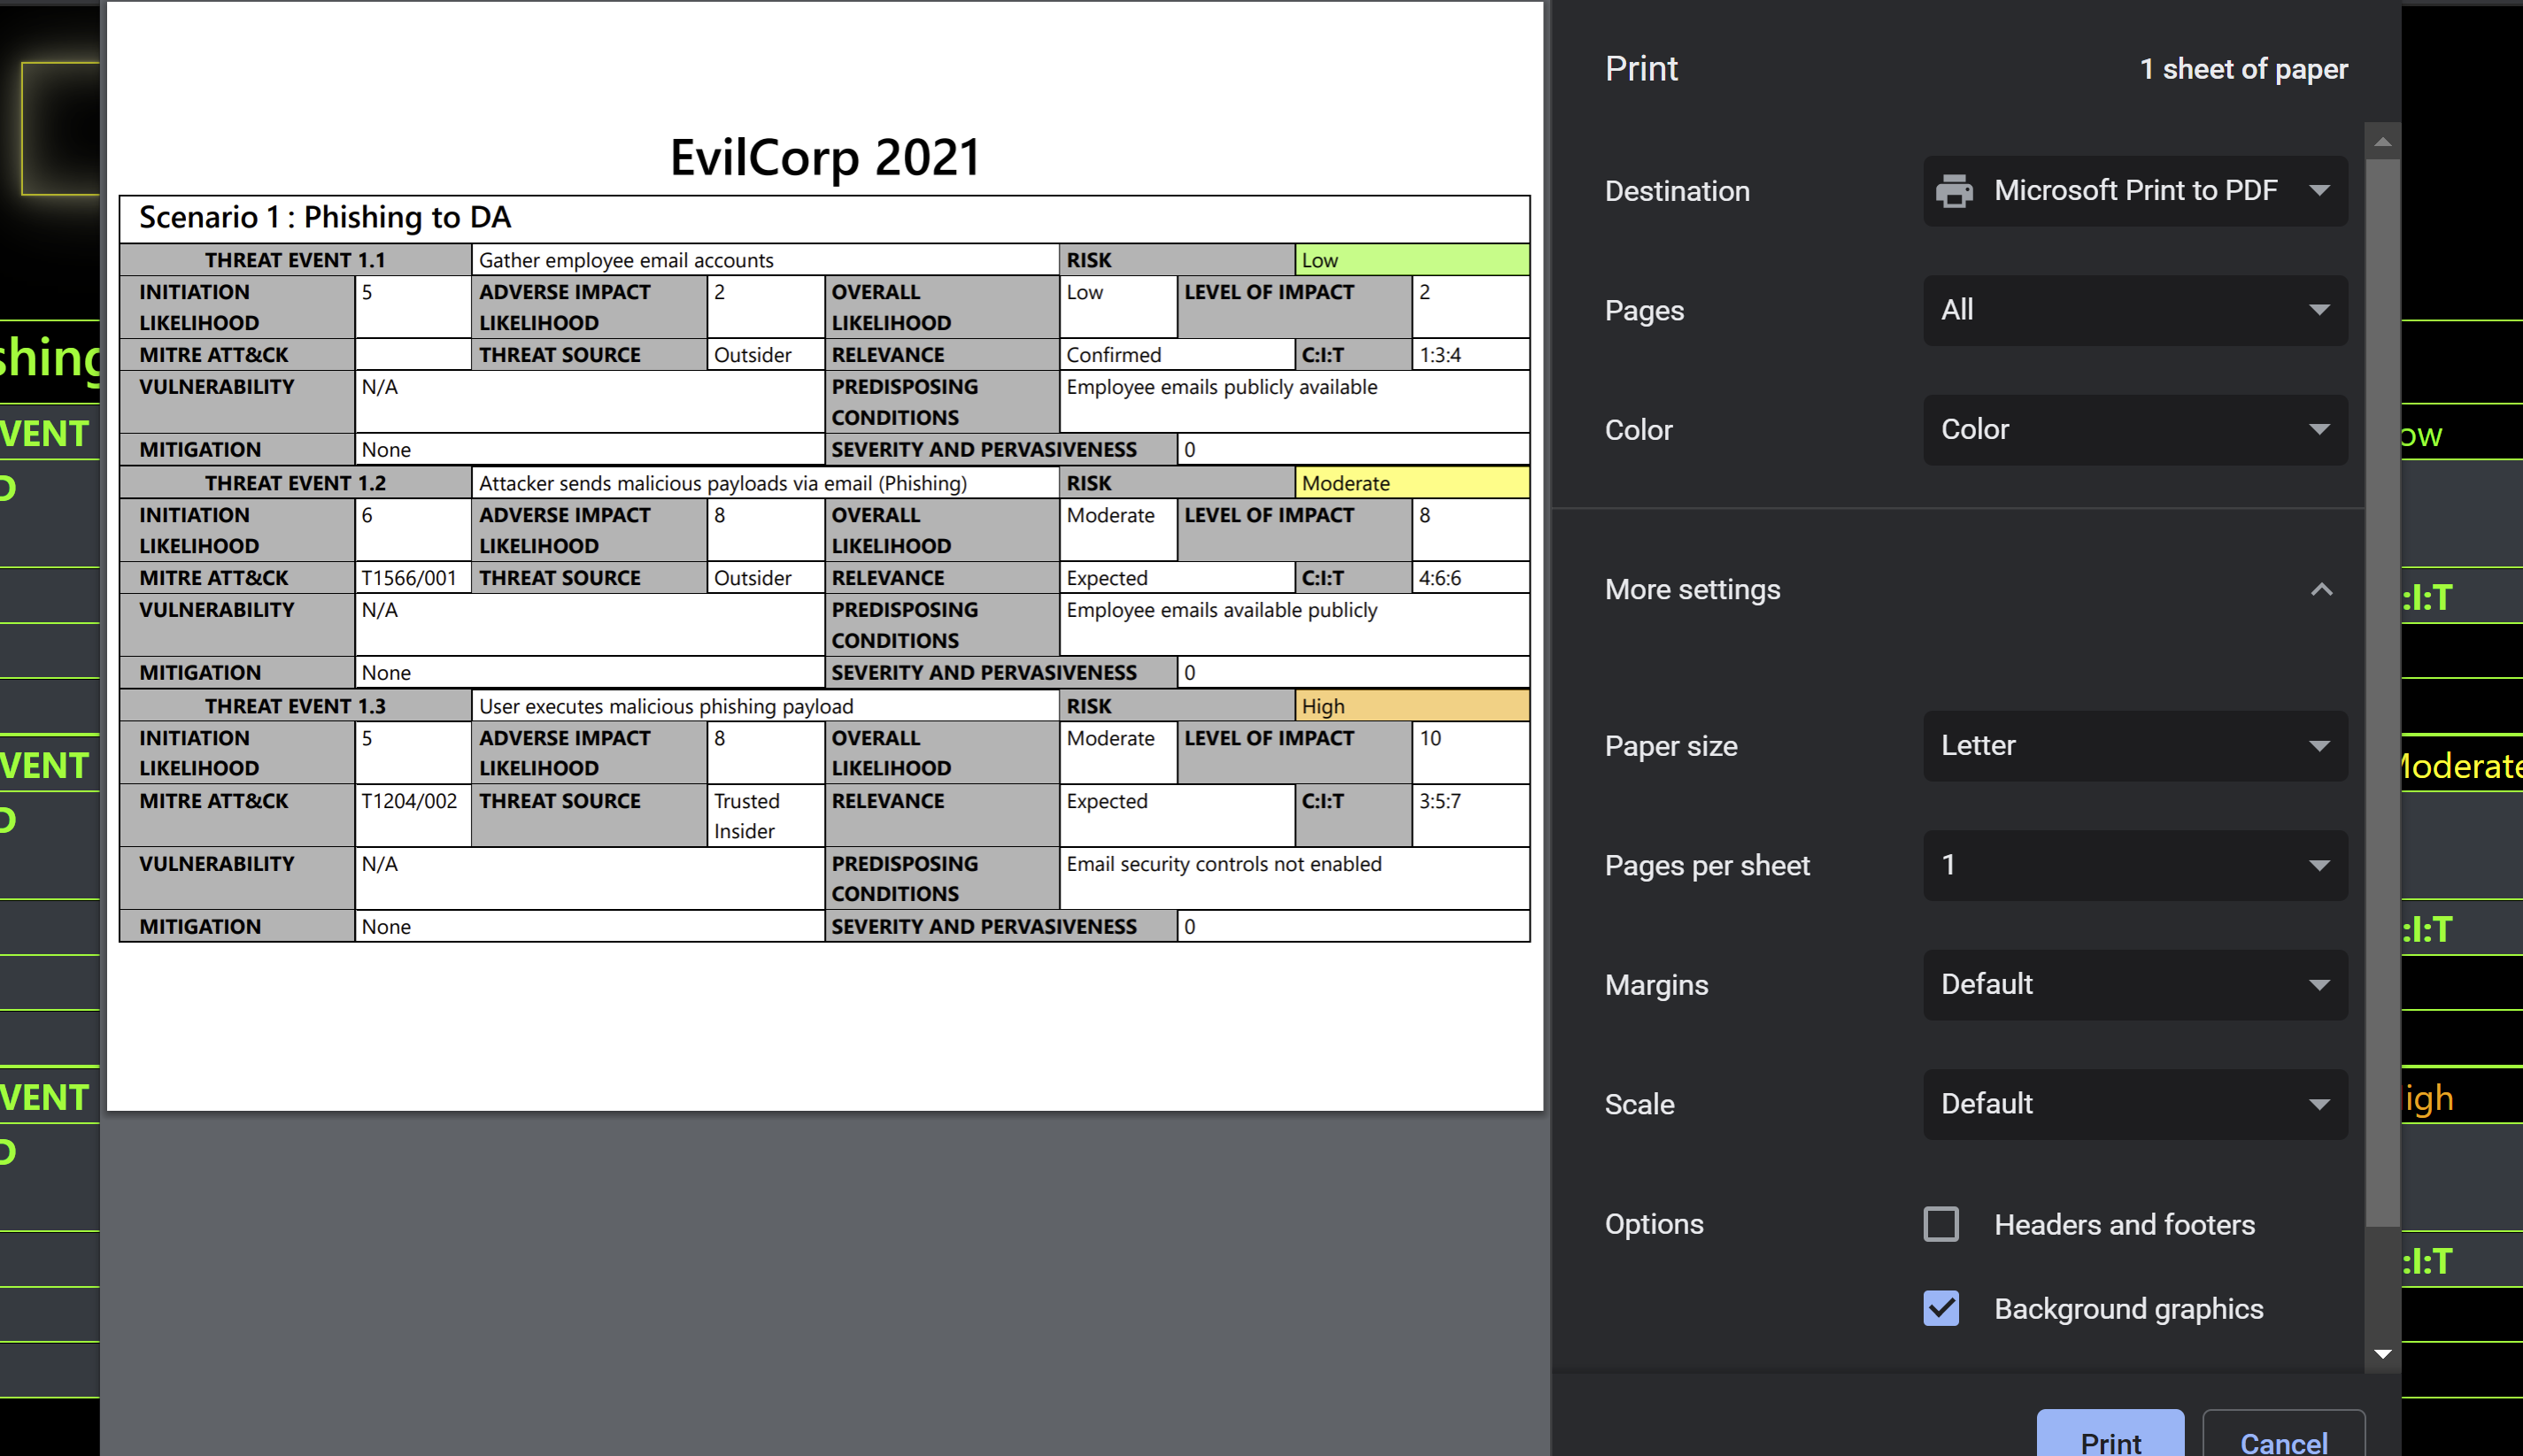
Threat Matrix PDF Preview
To export your Assessment to a printable PDF, select the Assessment you want to export. Then, from the Scenarios page, click "EXPORT" followed by "HTML". This will present a threat matrix formatted to fit within tables that can be printed as a PDF. It is paginated to avoid page breaks within events, and is designed to be printed in landscape mode. To get the full effect of the page styling in the printed version, in your print settings, please disable headers and footers. Also, enable background graphics.
Creating Threat Trees
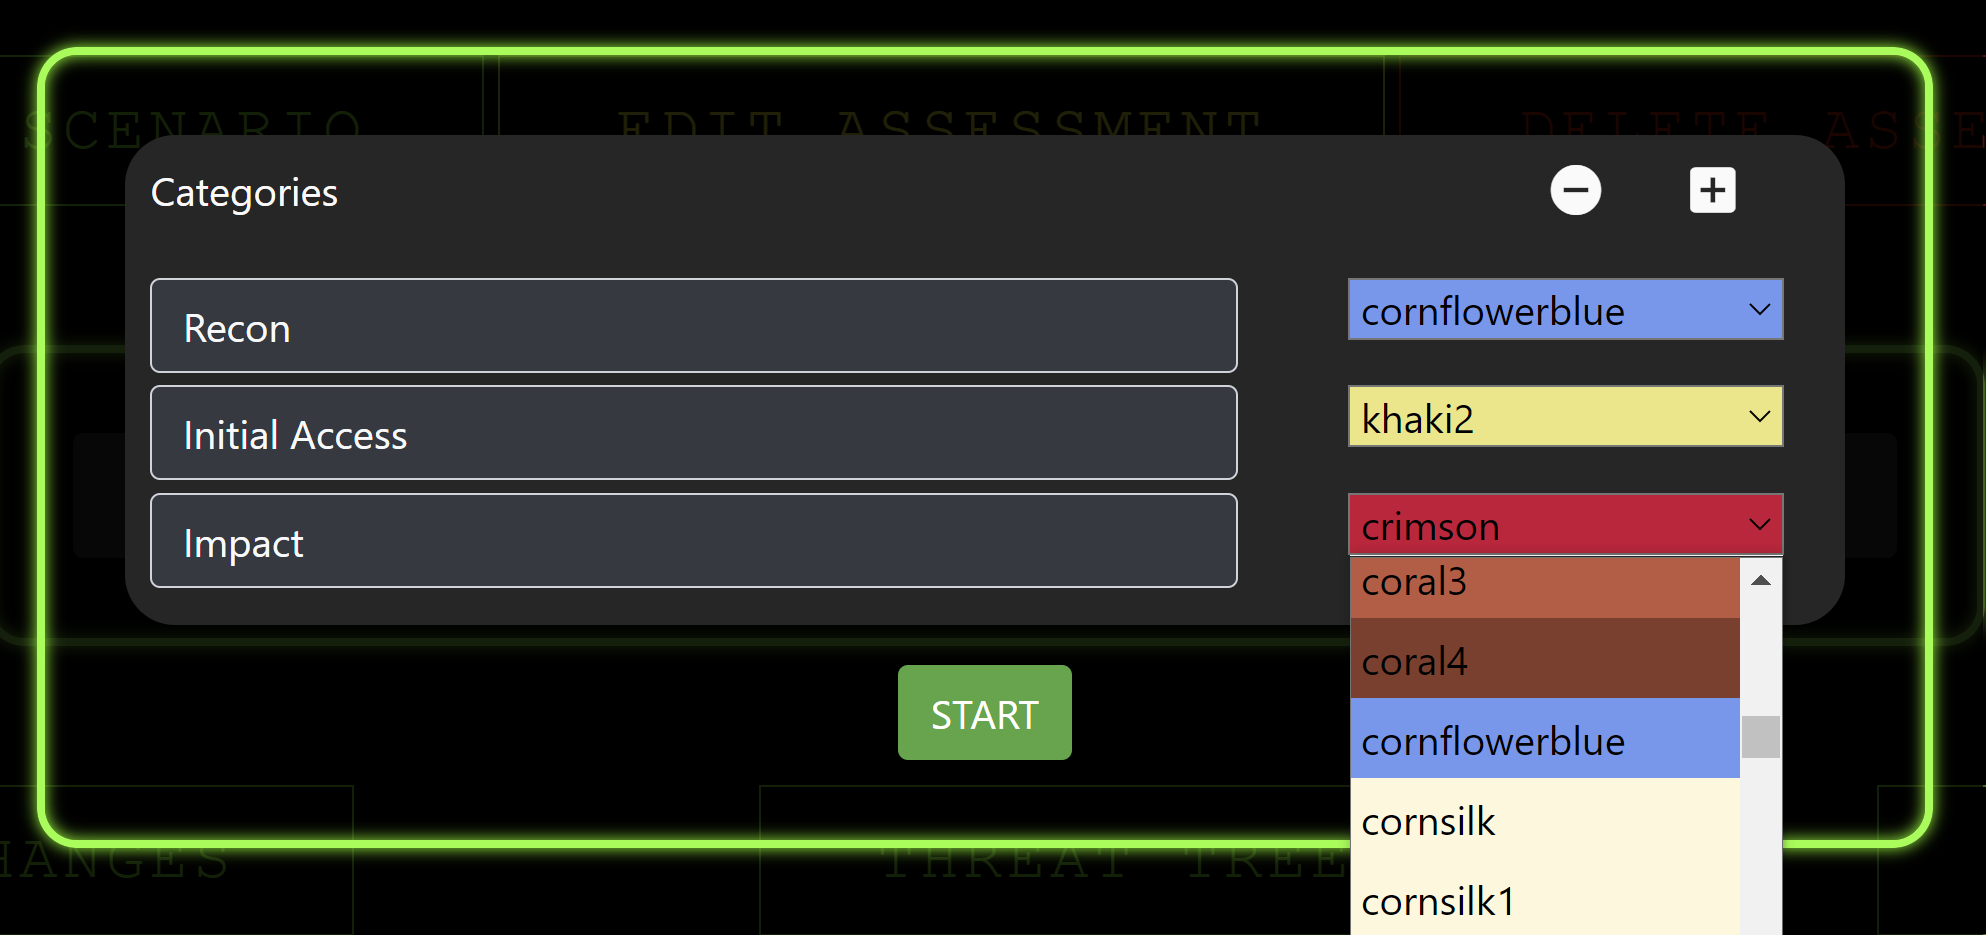
Threat Tree Categories
When creating a Threat Tree for the first time under an assessment, the user is presented with the ability to create categories that will be used within the Threat Tree. These can be entirely custom so that the tree can convey whatever sort of information is necessary. Each category is assigned a color by the user that will be used to colorize that category's nodes.

Threat Tree Graph Settings
Once the categories are entered and the tree is generated, the user is brought to the edit page. Here, the user has the options to save the current changes, delete the tree and start over, or go back to the scenarios screen. Clicking the "EXPORT" button will generate the Threat Tree graph along with a legend that can be used in other reporting utilities.
Each graph has a collection of settings that will determine how the resulting tree looks. Each settings has an info helper button to aid the end user in making selections. These info helpers will have either textual or graphical examples to ensure operator understanding.
Threat Tree Editing
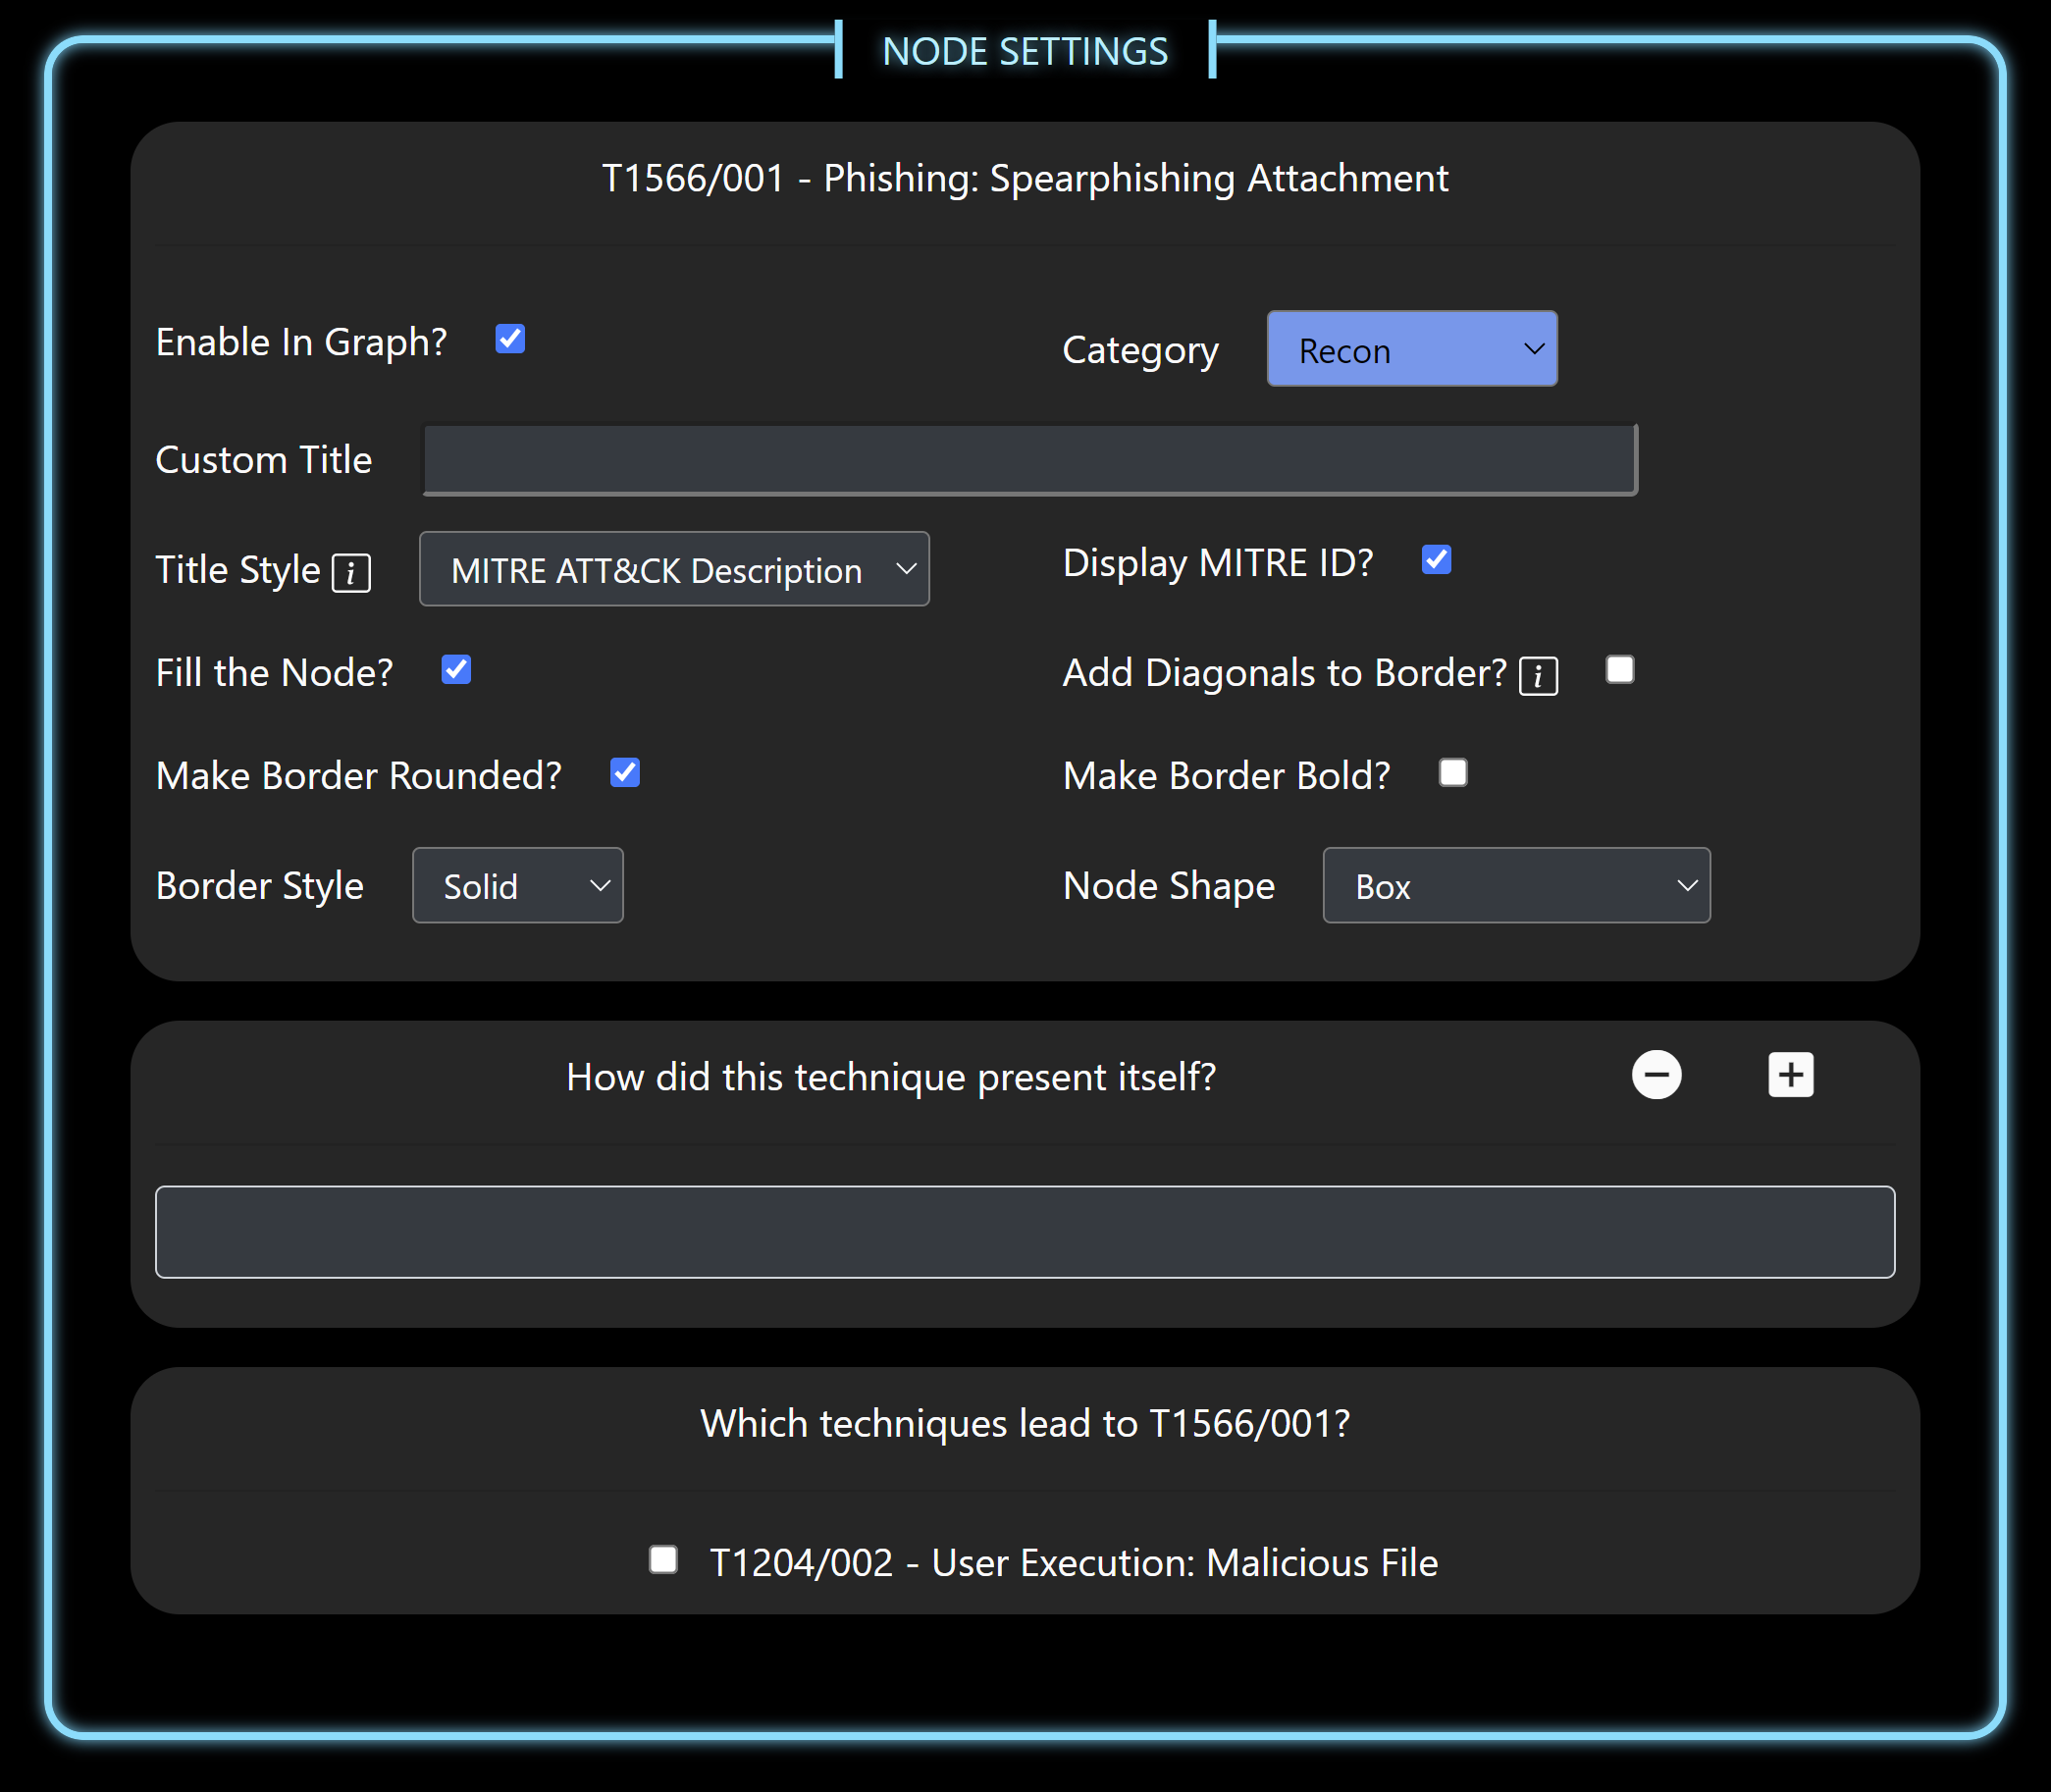
The nodes in a Threat Tree are the set of MITRE ATT&CK IDs used across the entire assessment. Each node within a Threat Tree comes with its own collection of settings. Where these settings are not immediately obvious, a info helper button has been included to provide more insight.
The section titled "How did this technique present itself?" is where the user would place the specific actions taken during the assessment that were categorized by the corresponding ATT&CK ID.
The section titled "Which techniques lead to TXXXX?" is where the edges are connected between nodes. It is possible to link multiple nodes to each other showing multiple paths of compromise.
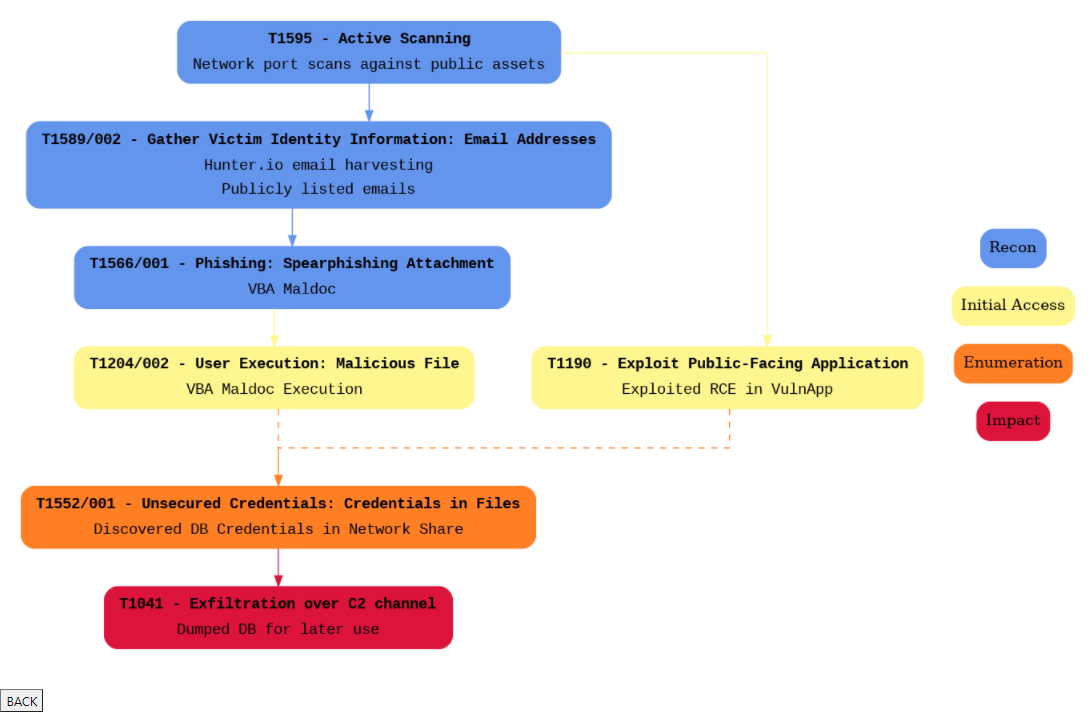
Threat Tree Export
Once the user finishes applying the desired settings, an exported Threat Tree might look similar to the above example.
Conclusion
This article was originally published here while I was working with Black Lantern Security. The project can be found here, and has since had quite a few updates written about TODO.